

Installation: network drive
Folder containing slides will be located on a network drive
Before getting started...
We recommend always using the latest version of the MSI installer.
Latest version 2026.9.0 · 11 September 2026 ·
- Fixed an issue where Slidebuilder could not download content from SharePoint when the content was shared using SharePoint's longer link format, which tenants get when "Use shorter links when sharing files and folders" is turned off in the SharePoint admin centre.
Installs for every user on the computer. Requires administrator rights.
MSI · 7.7MB ·
Is Windows blocking the download?
Our installers are signed with an EV certificate issued to Slidebuilder B.V. Even so, Windows SmartScreen may temporarily flag a new version as unknown until it has been downloaded often enough. This is normal and resolves itself.
1 · The browser holds the file back
Next to the download, click ⋯ > Keep > Keep anyway.
2 · “Windows protected your PC”
Click More info and then Run anyway. Check that the publisher reads Slidebuilder B.V.
3 · Unblock the file manually
Right-click the file > Properties > tick Unblock at the bottom > OK.
Unblock-File .\slidebuilder-2026.9.0-machine.msi
Not sure? Check the fingerprint
(Get-FileHash .\slidebuilder-2026.9.0-machine.msi).Hash -eq '74598c58434b9f23d0ea67cb73db967dd4c5f64657a57e06f1fb76cedba05d6f'
A result of True means the file matches the published SHA-256.
Previous versions
-
2026.8.1
28 August 2026
Machine installation
User installation
- The info window now shows which content package you have and when it was published.
- Fixed an issue where newly downloaded content wasn't used until PowerPoint was restarted.
- Fixed an issue where a content update that failed partway could leave incomplete content or the wrong licence details behind.
- Fixed an issue that hid the Settings group when no proofing languages were set up.
-
2026.8.0
20 August 2026
Machine installation
User installation
- Fixed an issue that prevented SharePoint content from being updated automatically.
- Fixed an issue where a preview that couldn't be loaded closed the item selection.
- Fixed an issue where repairing the installation didn't reinstall the certificate that lets PowerPoint trust the add-in.
-
2026.7.0
1 July 2026
Machine installation
User installation
- Fixed an issue where inserting icons failed with an error in PowerPoint version 2606 and newer.
-
2026.6.0
3 June 2026
Machine installation
User installation
- Adds support for SharePoint advanced permissions (Sites.Selected), so you can grant Slidebuilder access to just the site that hold your content instead of read access to every site in your tenant.
- Fixed an issue where PowerPoint appeared to hang with an empty ribbon the first time it started after installing, while the Microsoft sign-in window stayed invisible.
- Fixed an issue where Slidebuilder could refuse to uninstall.
We raden aan om beide bestanden in een makkelijk vindbare map te plaatsen voordat je verder gaat.
Installation
Manual
Want to test how it works yourself first? Open the MSI file you downloaded at the top of this page, follow the steps below, and click Install.
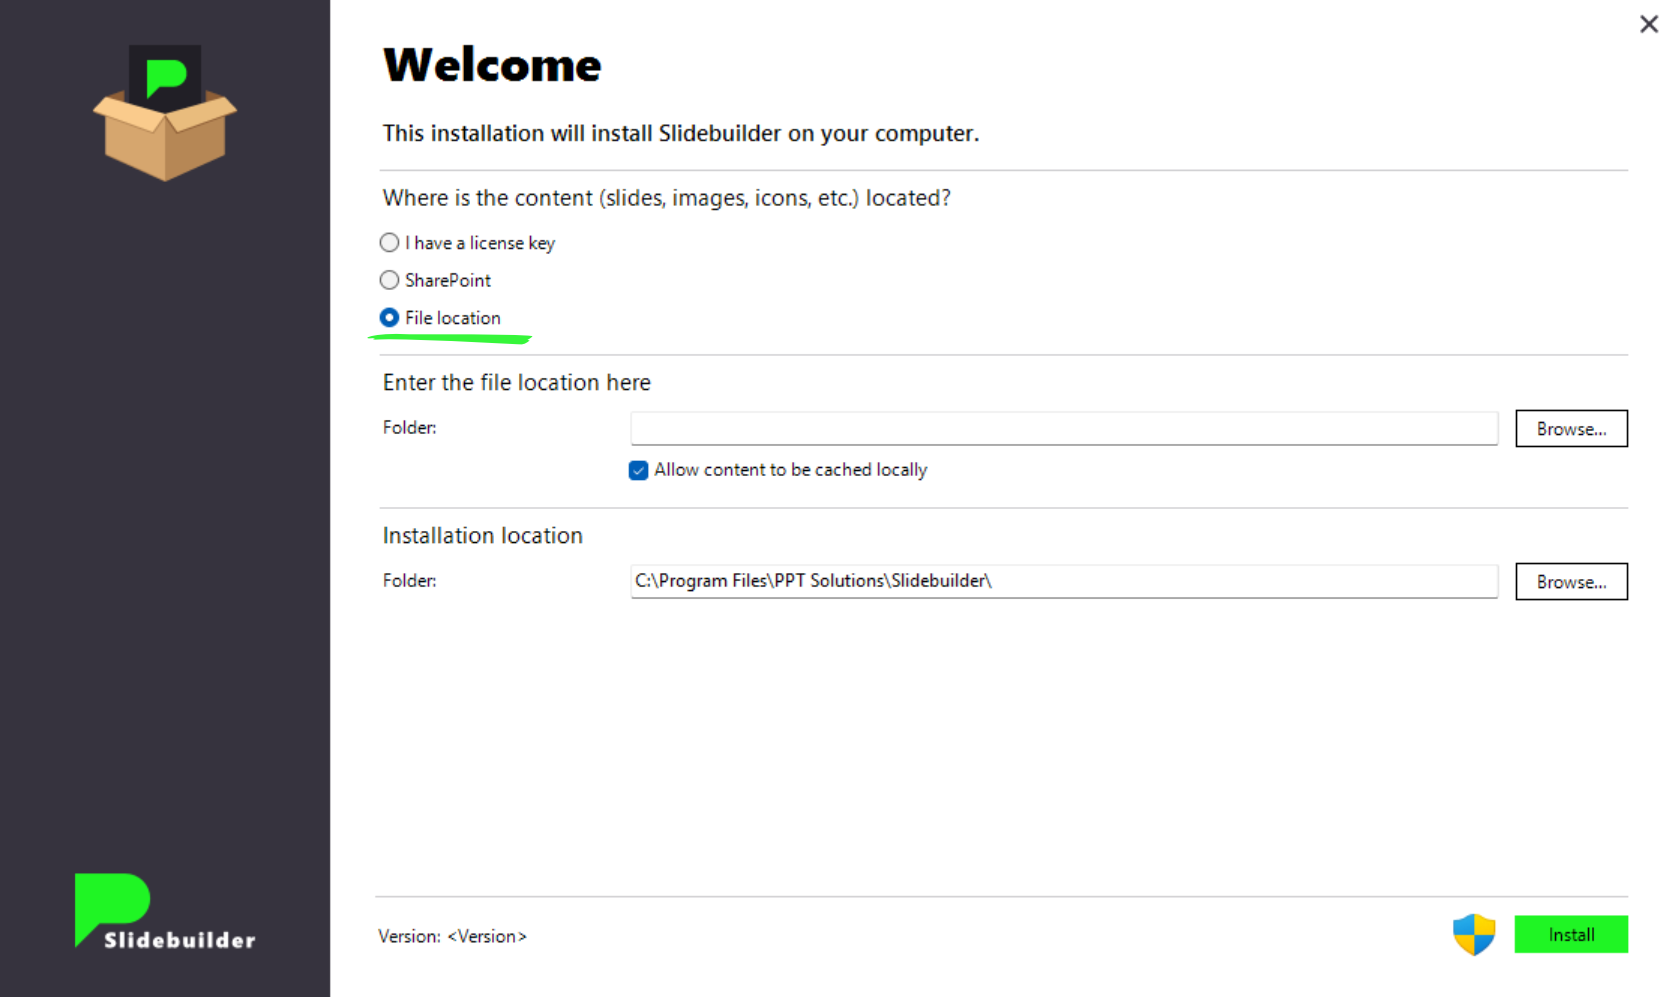
Unattended install
The installation can also be performed without user interaction, for example via Command Prompt (1 line):
msiexec /i slidebuilder-<version>-<install-type>.msi /qn CONTENTPATH="\\server\share"
Note!
Run this command with sufficient privileges.
Microsoft Intune
Slidebuilder can also be easily deployed via Microsoft Intune. To do so, go to the Microsoft Intune portal and navigate to Apps. Then click Platforms > Windows.
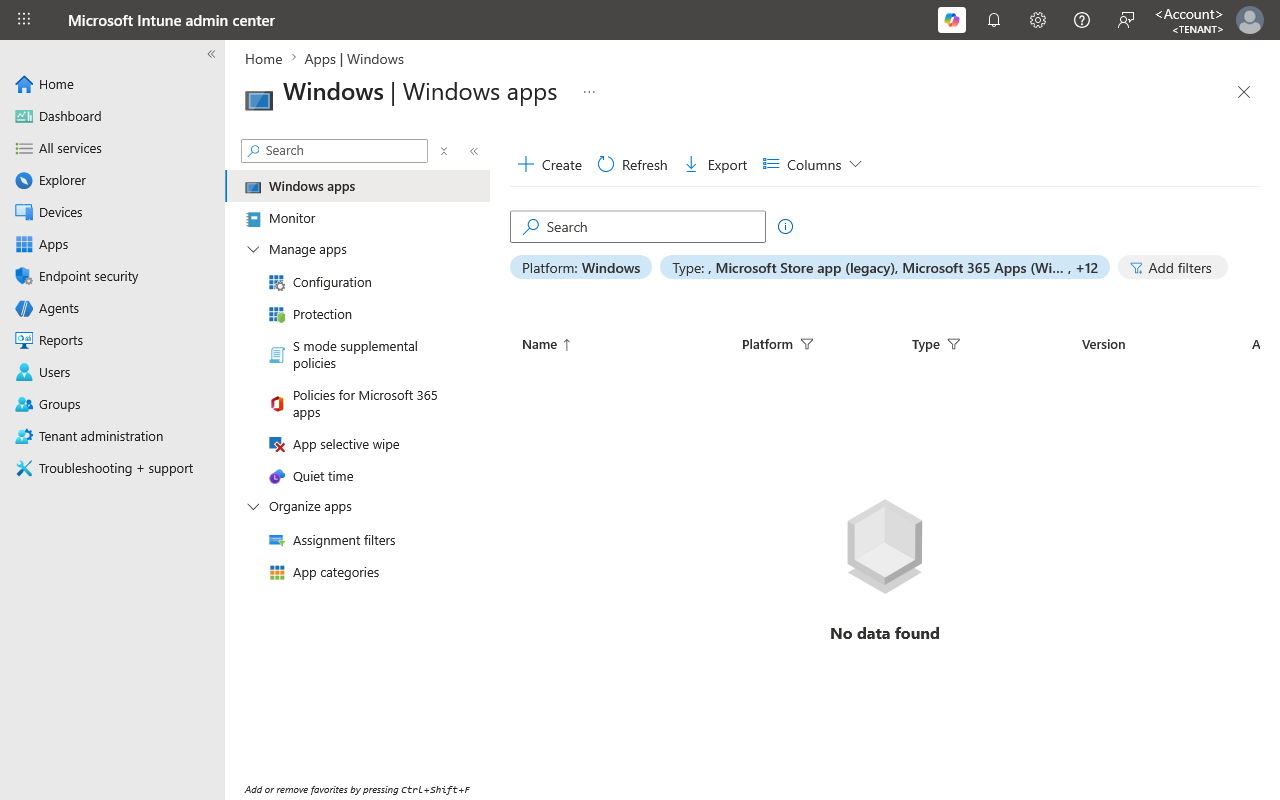
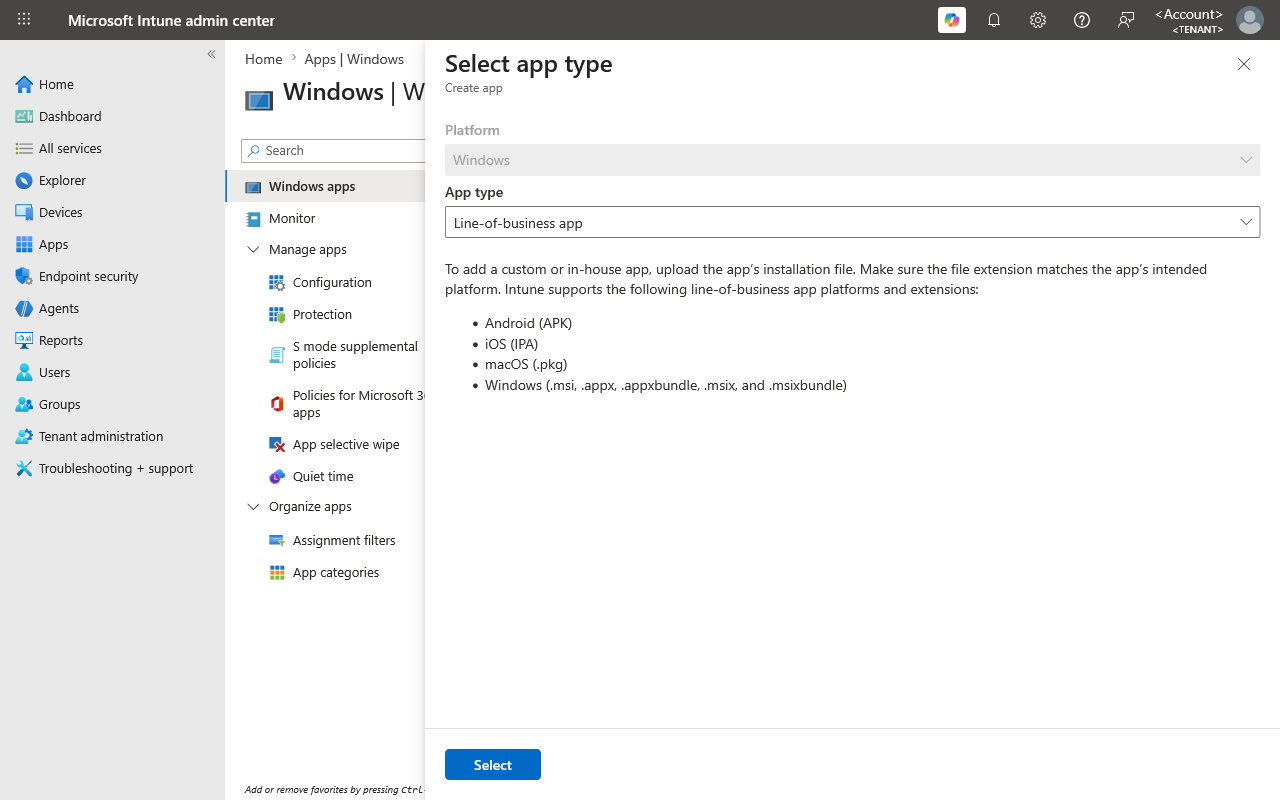
Click Create and select Line-of-business app as the app type. Click Select.
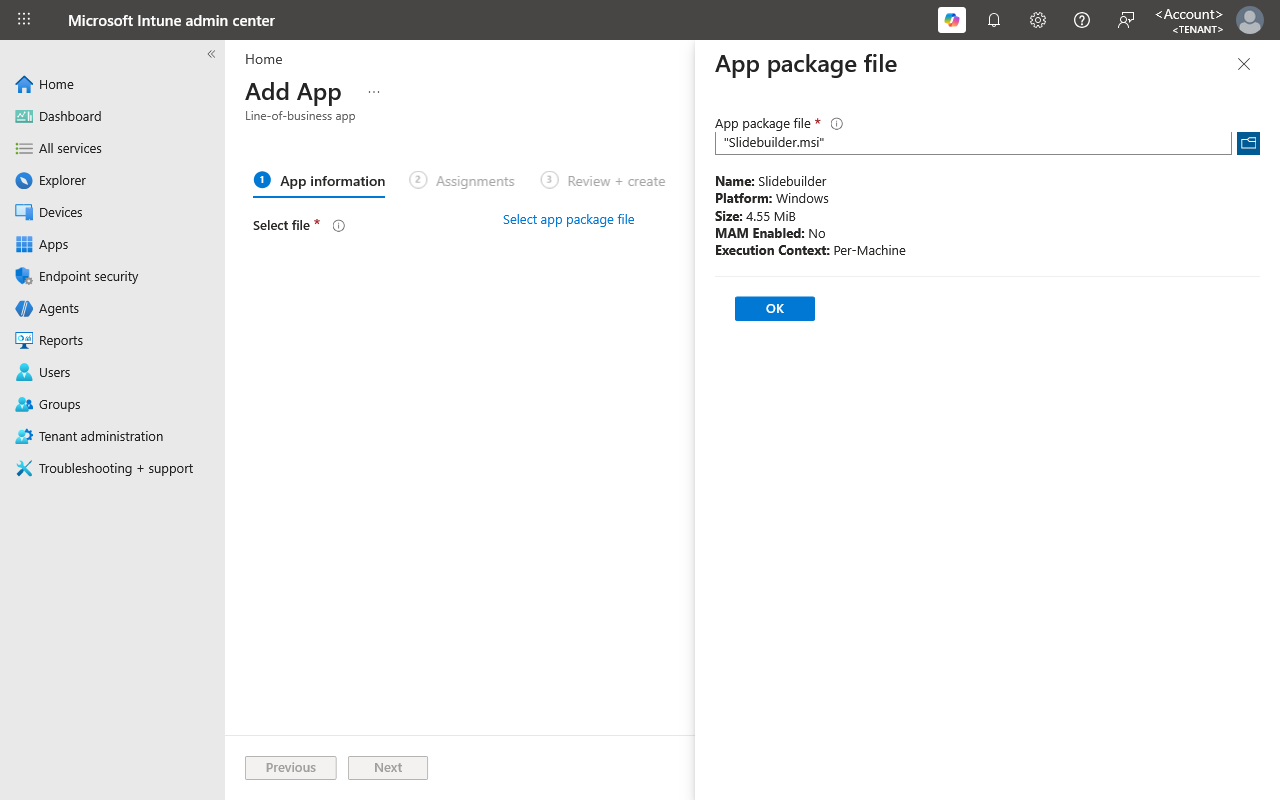
Click Select app package file, choose the MSI file you saved earlier, and then click OK.
On the next page, you will be asked to enter some information. Fill it in as follows:
Description
With Slidebuilder, employees have direct access within PowerPoint to a library of commonly used slides, enabling them to quickly create presentations that comply with the organization’s brand guidelines.
Publisher
Slidebuilder
Command-line arguments
CONTENTPATH="\\server\share"
Logo
You can download the logo file here.

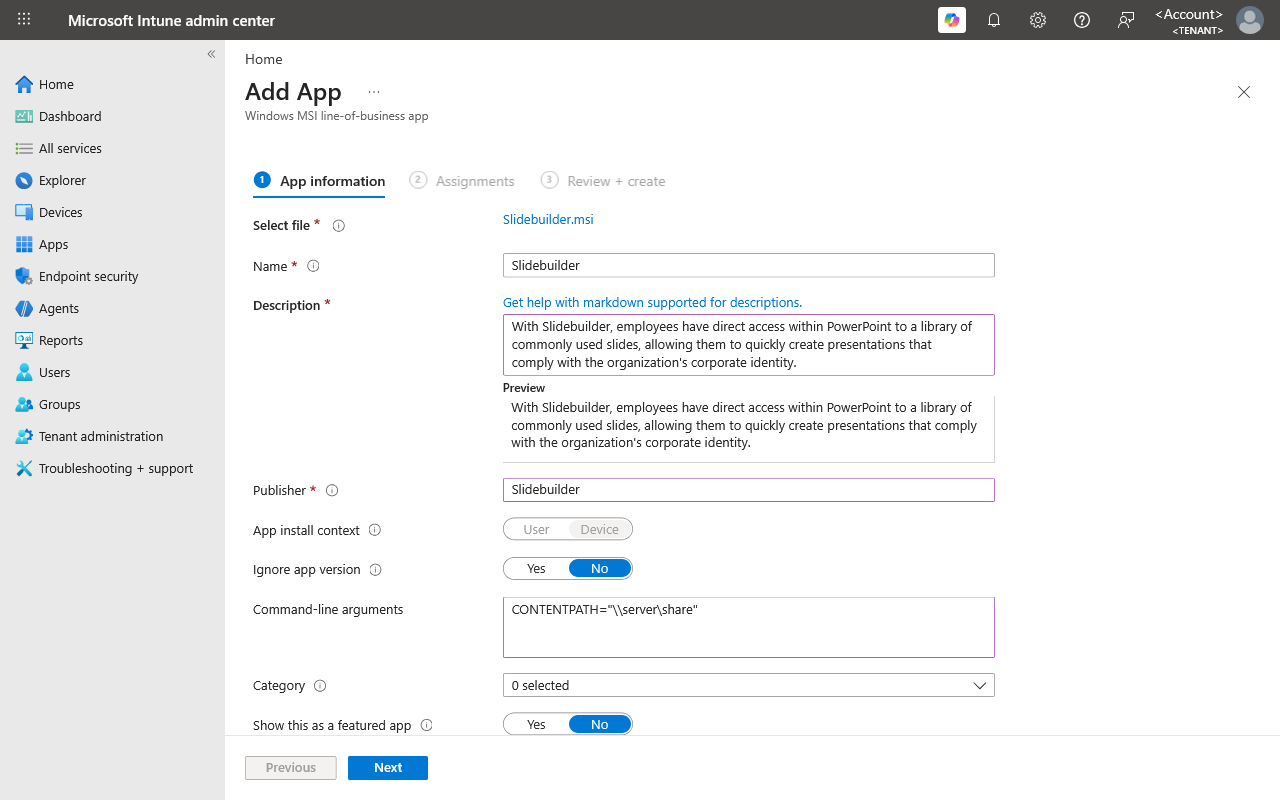
Pas andere velden indien nodig aan en klik op Volgende [EN: Next].
Wijs de applicatie toe aan de gewenste groep(pen).
Wij raden aan om eerste een test uitrol te doen met een selecte hoeveelheid gebruikers
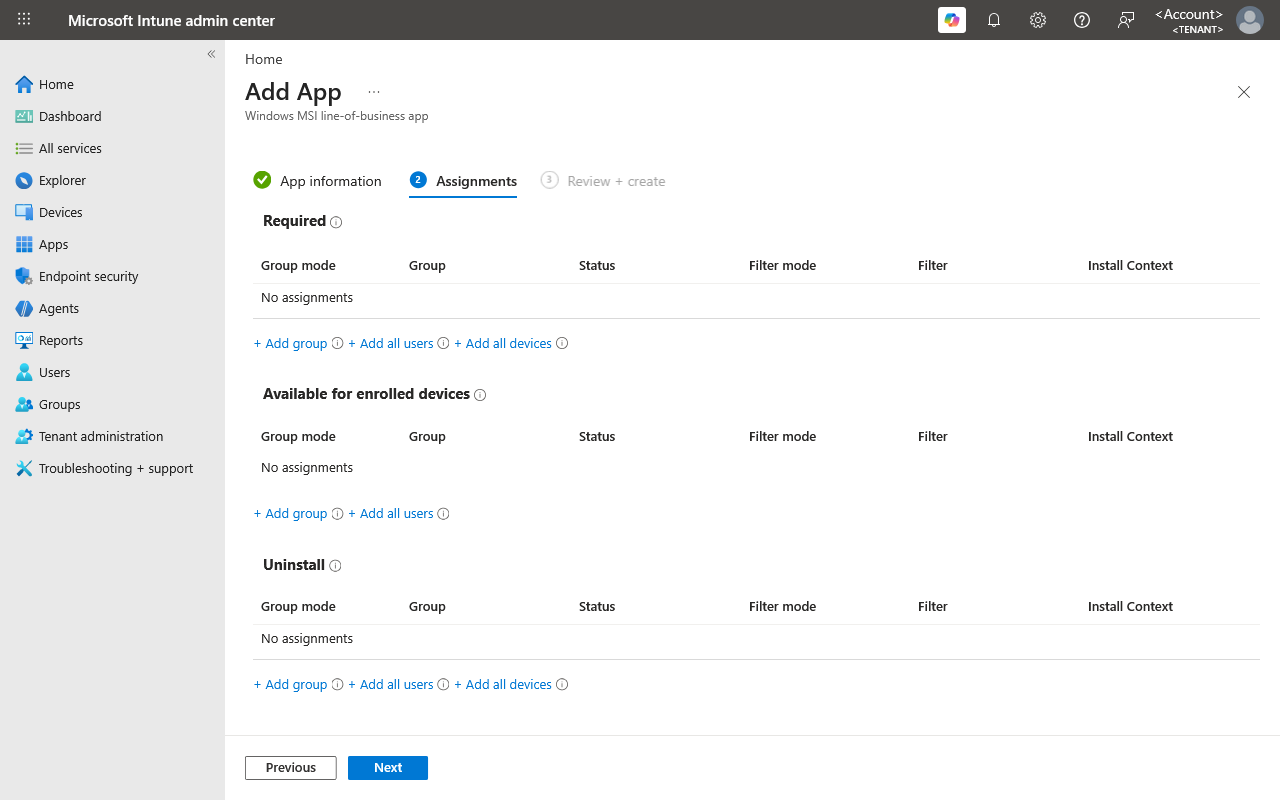
Klik op Volgende [EN: Next], controleer de gegevens en klik op Maken [EN: Create].
Updating content
Step 1
Download the new Slidebuilder work folder you received via WeTransfer and extract the .zip file to a local folder on your computer.
Then go to the network location where the current work folder is stored. We recommend creating a backup of this folder and saving it locally before continuing.
Step 2
To update the work folder, keep the main network folder in place and delete all individual Slidebuilder files and folders inside it.
If possible, perform this update when few users are actively using Slidebuilder.
Next, copy all files and folders from the new local work folder into the now-empty network folder. When finished, you should see folders such as Images and Slides directly inside the main folder again.
The update is now complete. The new content will automatically become available in PowerPoint for all Slidebuilder users in your organization.
If you have any questions or run into issues, submit a support ticket below and we’ll be happy to help.