

Installation : SharePoint
Folder containing slides will be located on SharePoint
For new installations, we recommend using the “Granual permissions” option. Read the instructions here.
Before getting started...
We recommend always using the latest version of the MSI installer.
Latest version 2026.9.0 · 11 September 2026 ·
- Fixed an issue where Slidebuilder could not download content from SharePoint when the content was shared using SharePoint's longer link format, which tenants get when "Use shorter links when sharing files and folders" is turned off in the SharePoint admin centre.
Installs for every user on the computer. Requires administrator rights.
MSI · 7.7MB ·
Is Windows blocking the download?
Our installers are signed with an EV certificate issued to Slidebuilder B.V. Even so, Windows SmartScreen may temporarily flag a new version as unknown until it has been downloaded often enough. This is normal and resolves itself.
1 · The browser holds the file back
Next to the download, click ⋯ > Keep > Keep anyway.
2 · “Windows protected your PC”
Click More info and then Run anyway. Check that the publisher reads Slidebuilder B.V.
3 · Unblock the file manually
Right-click the file > Properties > tick Unblock at the bottom > OK.
Unblock-File .\slidebuilder-2026.9.0-machine.msi
Not sure? Check the fingerprint
(Get-FileHash .\slidebuilder-2026.9.0-machine.msi).Hash -eq '74598c58434b9f23d0ea67cb73db967dd4c5f64657a57e06f1fb76cedba05d6f'
A result of True means the file matches the published SHA-256.
Previous versions
-
2026.8.1
28 August 2026
Machine installation
User installation
- The info window now shows which content package you have and when it was published.
- Fixed an issue where newly downloaded content wasn't used until PowerPoint was restarted.
- Fixed an issue where a content update that failed partway could leave incomplete content or the wrong licence details behind.
- Fixed an issue that hid the Settings group when no proofing languages were set up.
-
2026.8.0
20 August 2026
Machine installation
User installation
- Fixed an issue that prevented SharePoint content from being updated automatically.
- Fixed an issue where a preview that couldn't be loaded closed the item selection.
- Fixed an issue where repairing the installation didn't reinstall the certificate that lets PowerPoint trust the add-in.
-
2026.7.0
1 July 2026
Machine installation
User installation
- Fixed an issue where inserting icons failed with an error in PowerPoint version 2606 and newer.
-
2026.6.0
3 June 2026
Machine installation
User installation
- Adds support for SharePoint advanced permissions (Sites.Selected), so you can grant Slidebuilder access to just the site that hold your content instead of read access to every site in your tenant.
- Fixed an issue where PowerPoint appeared to hang with an empty ribbon the first time it started after installing, while the Microsoft sign-in window stayed invisible.
- Fixed an issue where Slidebuilder could refuse to uninstall.
We recommend placing both files in an easy-to-find folder before continuing.
Creating the app registration
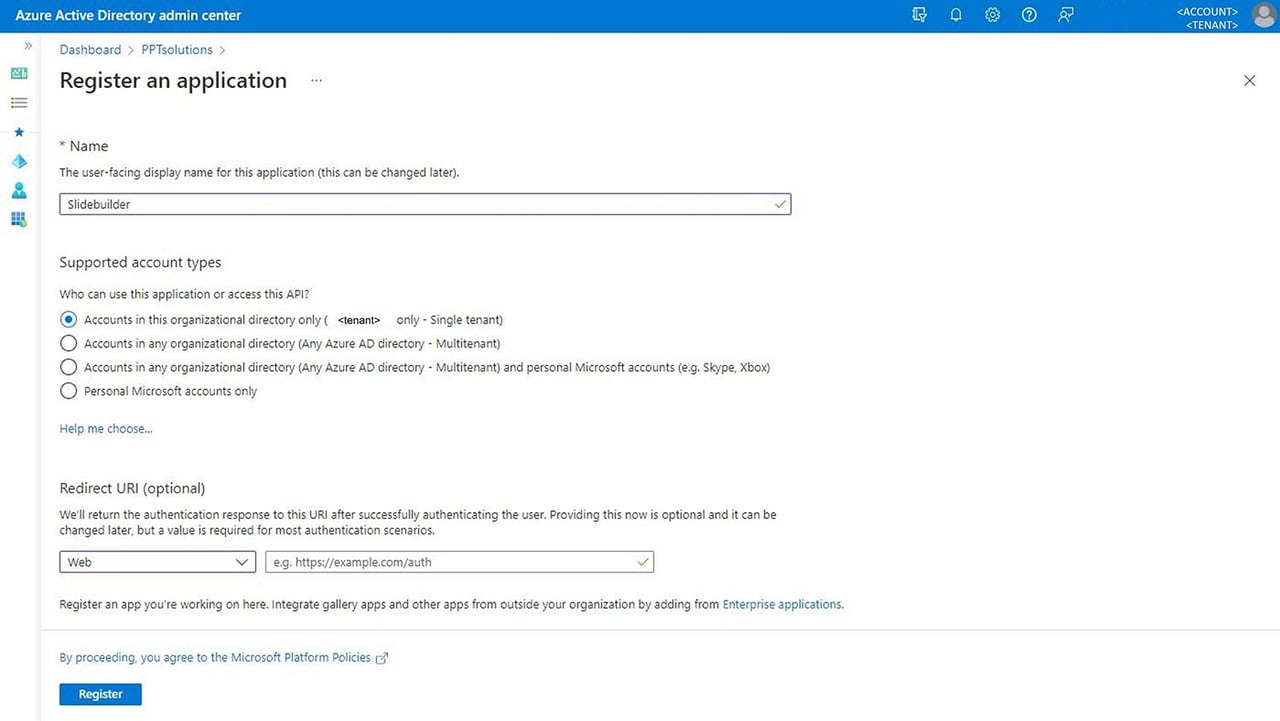
Open Azure Active Directory in the Azure portal and navigate to App registrations. Then click on New registration.
Give the application a name, e.g., ‘Slidebuilder’, and click on Register.
Then navigate to Authentication and click on Add a platform:
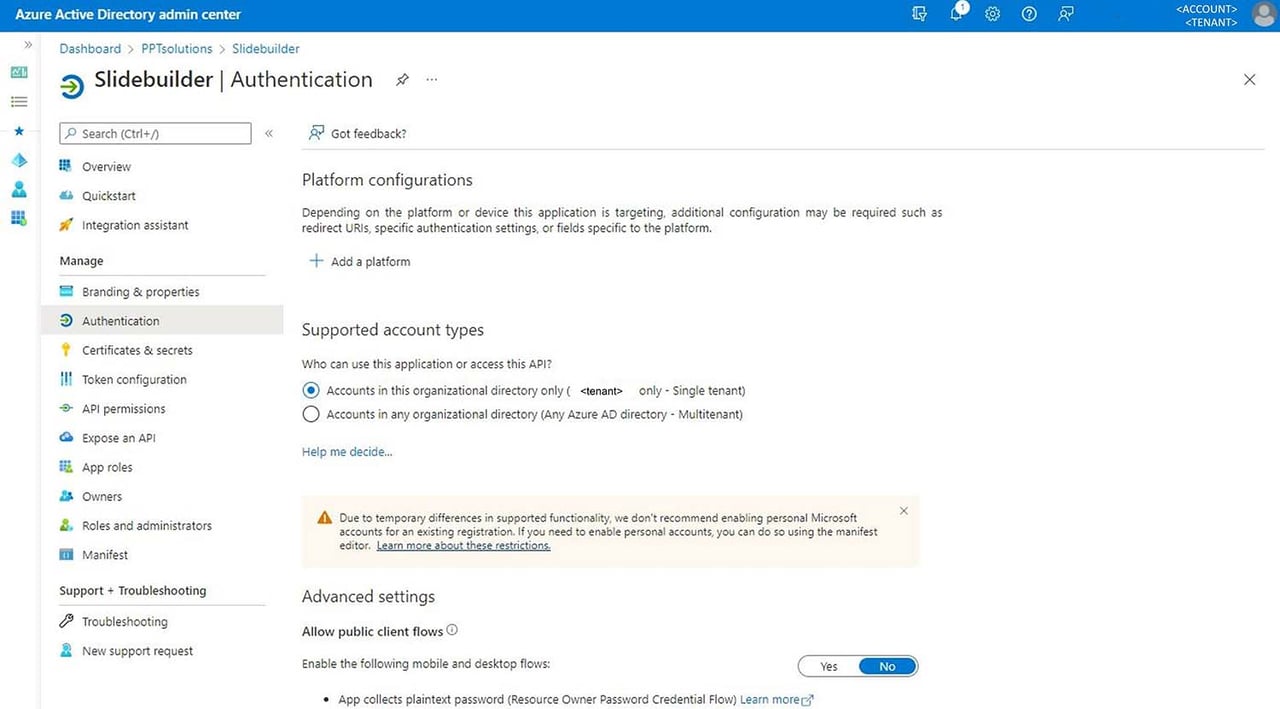
In the menu that appears, select Mobile and desktop applications:
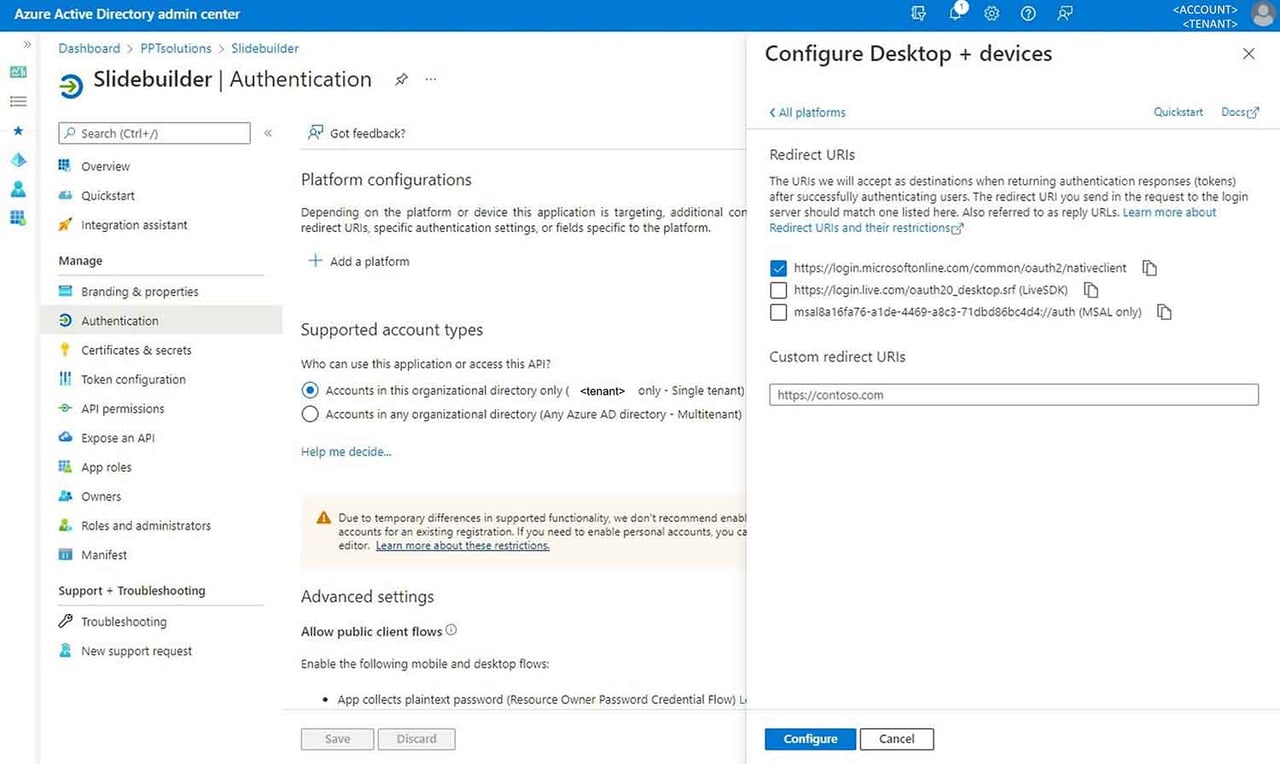
Select the option as shown below and click on Configure:
Navigate to API permissions and click on Add a permission.
Select:
Microsoft Graph -> Delegated permissions -> Sites -> Sites.Read.All
It should look like this:
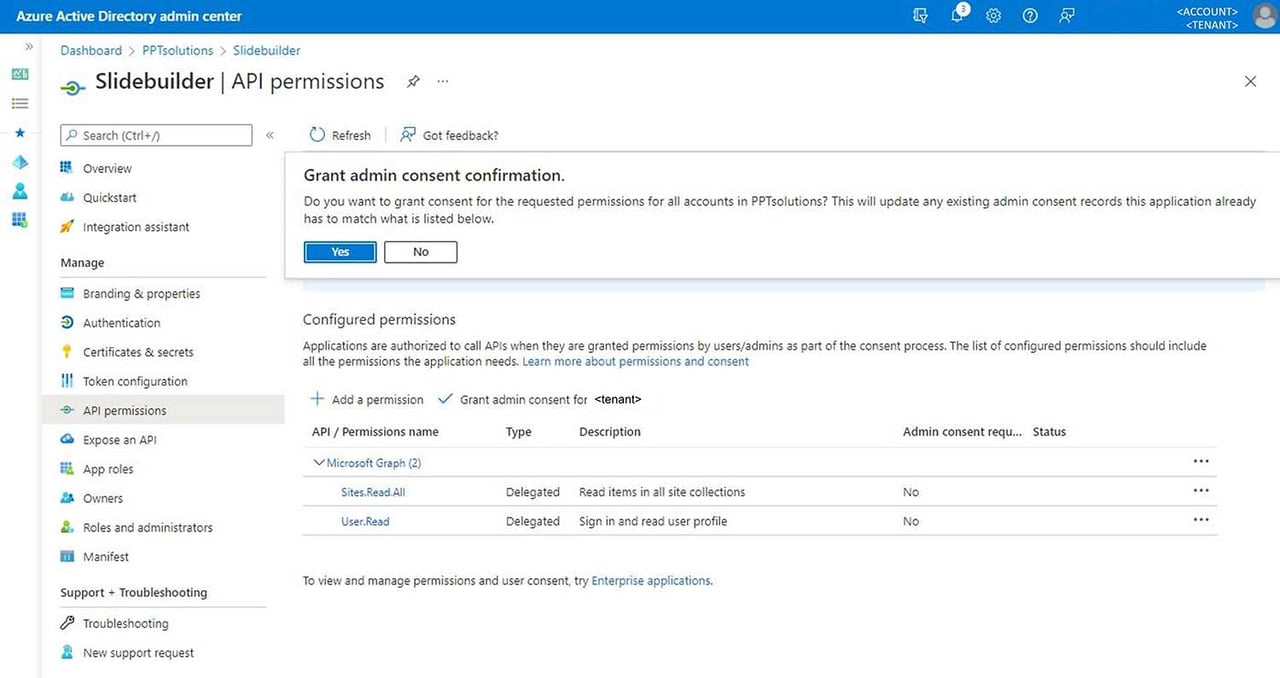
Select Grant admin consent for. This eliminates the need to grant individual access to each user.
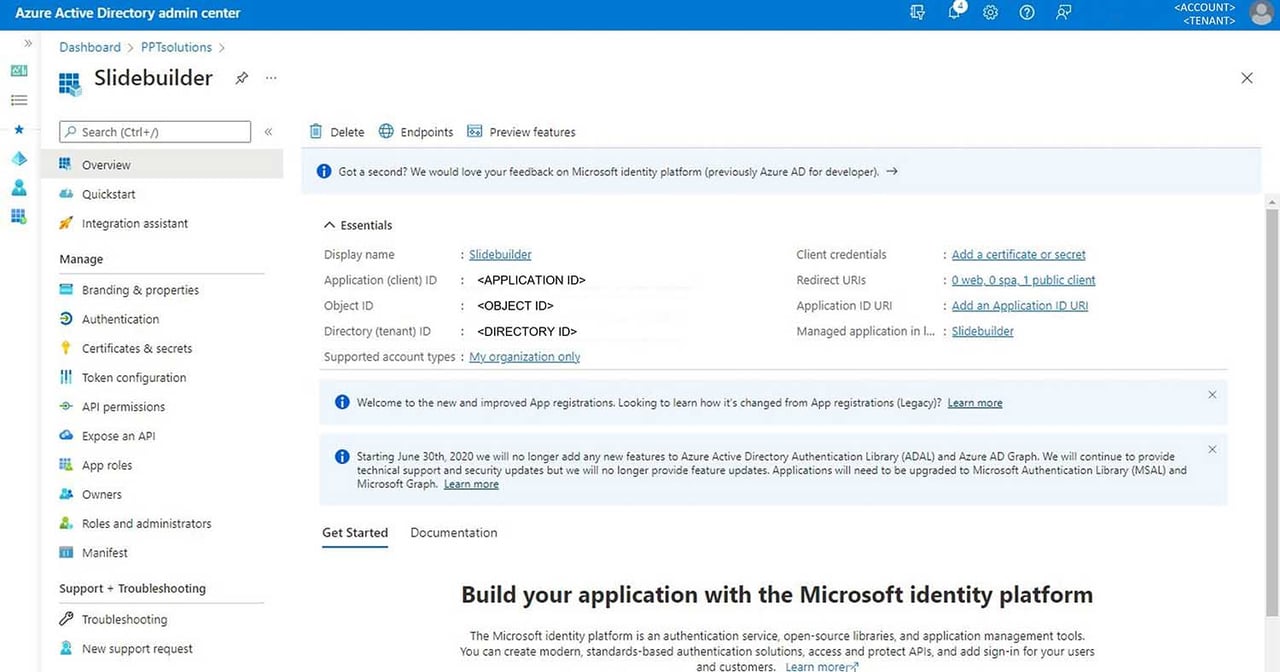
Finally, navigate to Overview. The values listed under Application ID (client ID) and Directory ID (tenant ID) are required when installing Slidebuilder.
Creating the SharePoint link
Slidebuilder can use files saved in a SharePoint Document Library. A Share Link must first be created for each file. To do this, follow the steps below:
Open the Document Library in the browser.
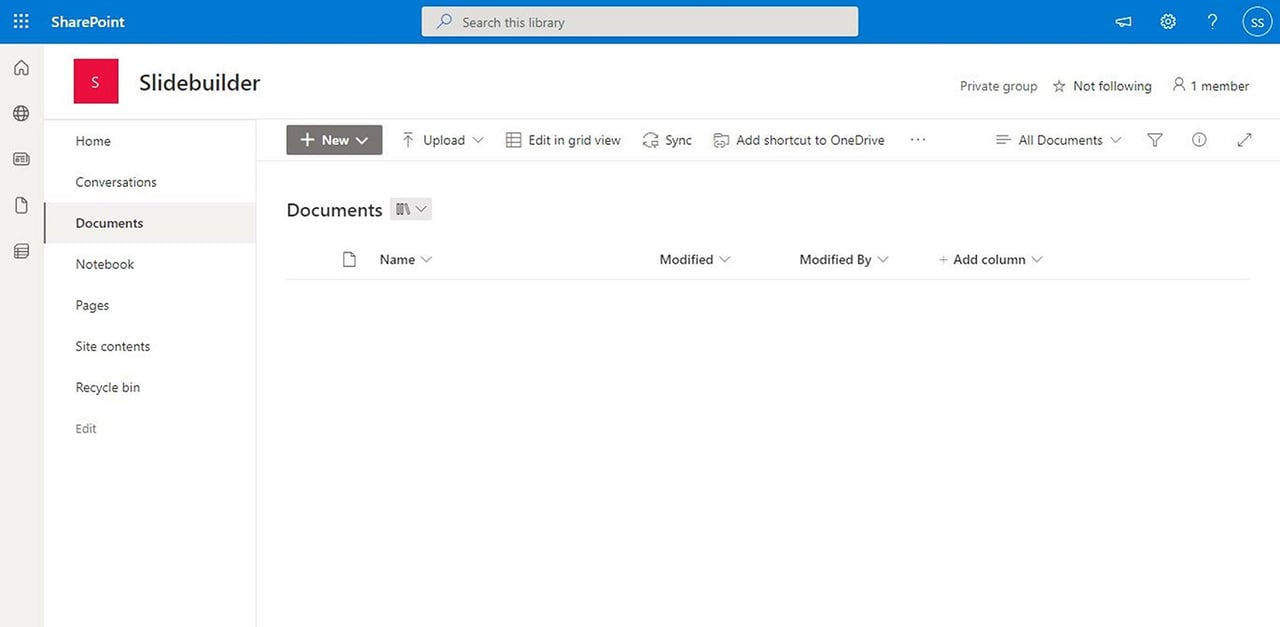
Upload the relevant ZIP file.
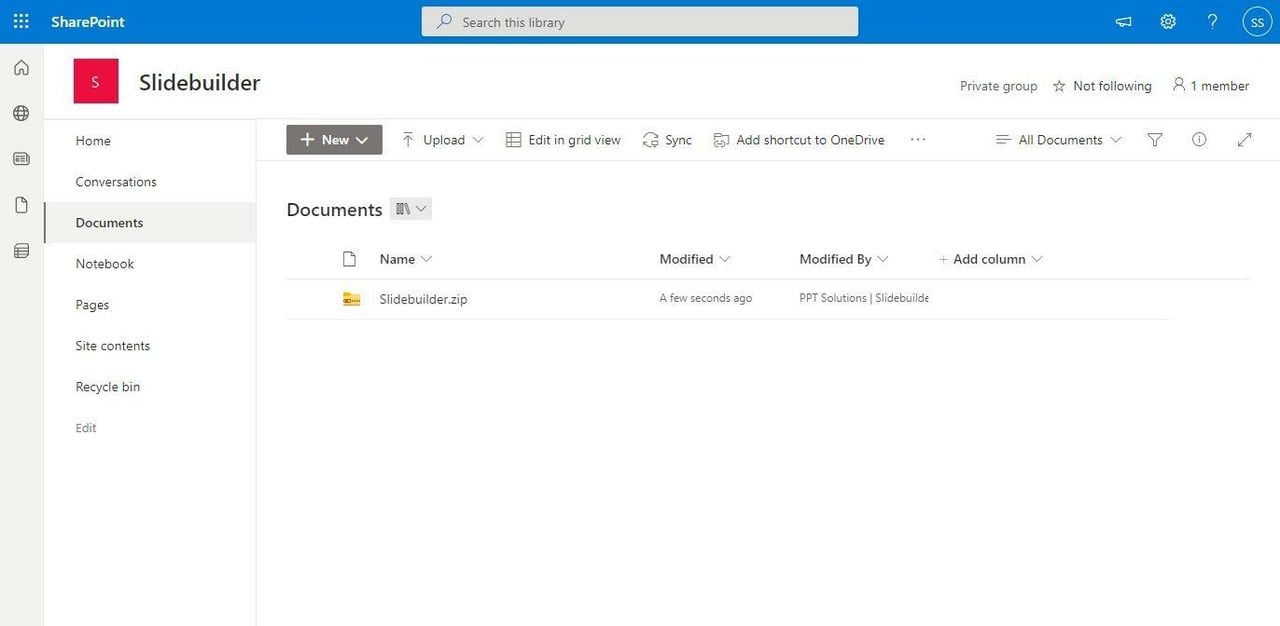
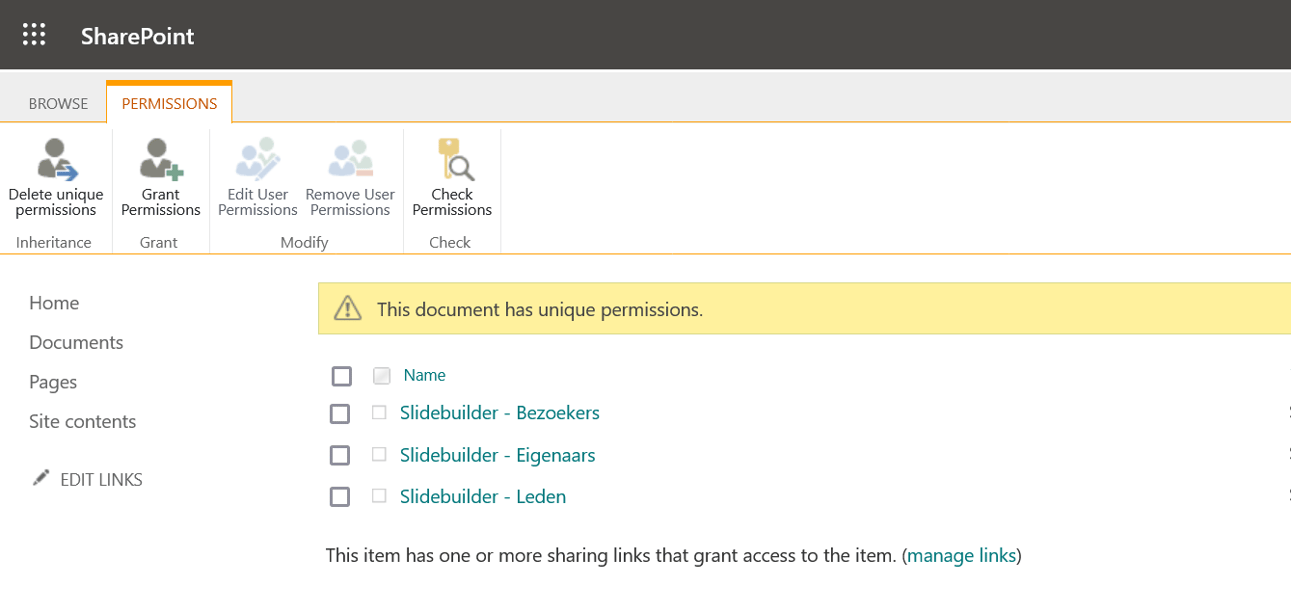
Verify that users have (read) permissions, by clicking on the space before the file name and choosing Manage Access from the '...' menu.

In the window that appears, again select '...' in the upper right corner and choose 'Advanced Settings'.
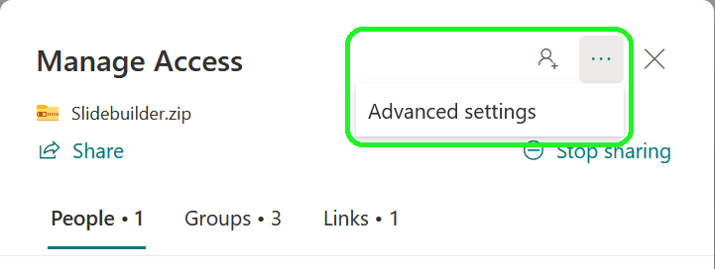
The Check Permissions button can then be used to check whether users actually have permissions. If not, add them first. This can be done at the file or library level depending on what is desired.
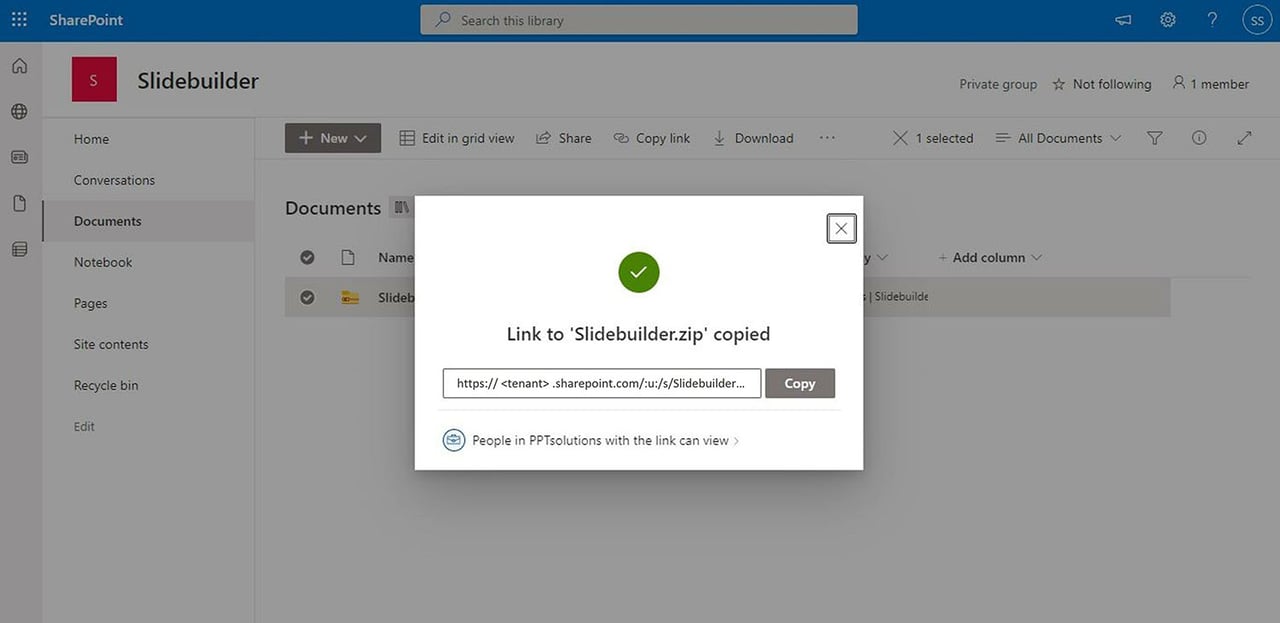
Next, return to the library and then make sure the file is selected again. This time choose Copy Link from the '...' menu.
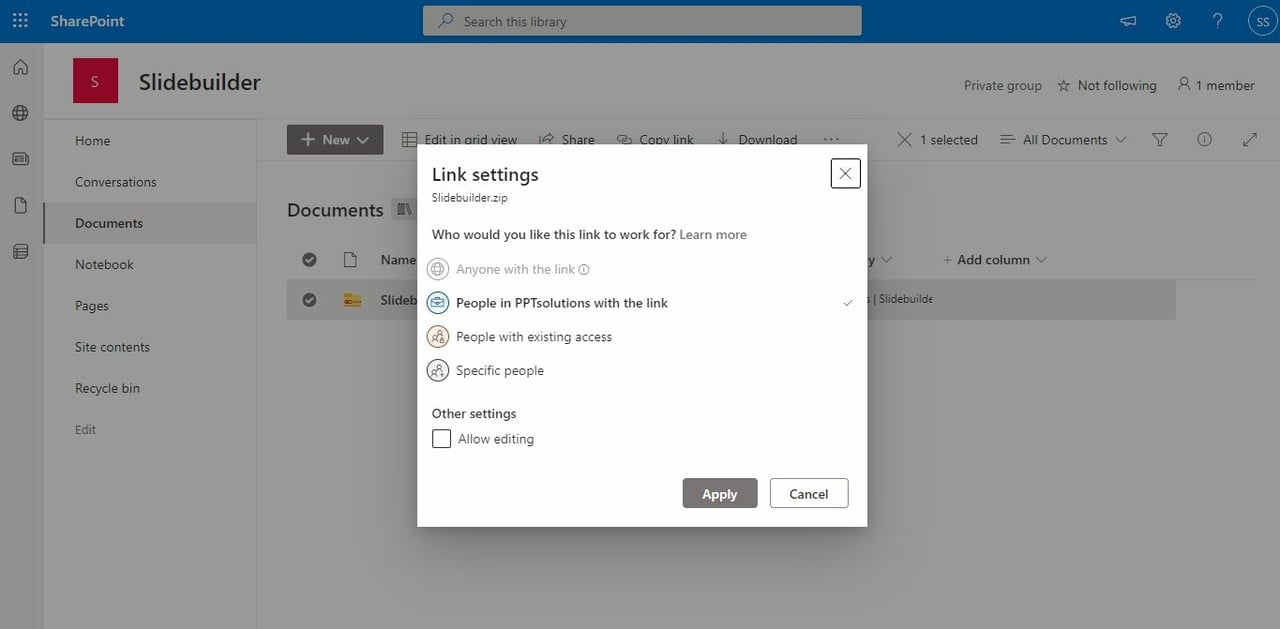
Click on the link at the bottom of the screen to change the link settings and click Apply.
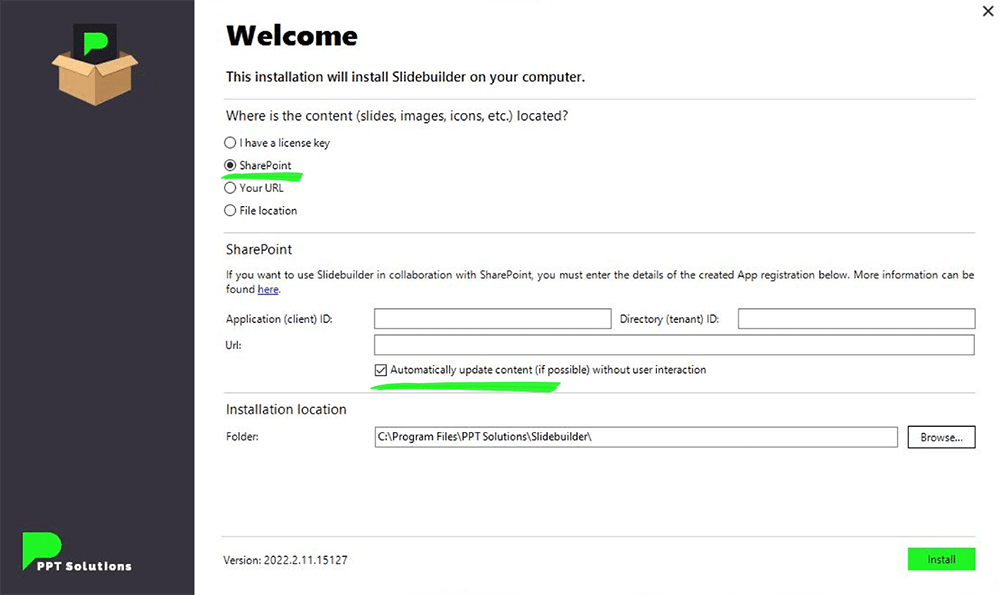
This link can then be used when installing Slidebuilder.

Important: Do you want to update the slides in the future?
If there is a new version of a ZIP file, simply replace the old ZIP-file. This ensures that the link remains the same and the slides are automatically updated.
Manual installation
Want to test how everything works first? Once you have created the SharePoint link and the app registration, you have everything you need to carry out the installation. If this is the case, open the MSI file you downloaded at the top of this page and follow the steps below and click Install.
Unattended installation
The installation can also be executed without user interaction, e.g. via a command prompt:
msiexec /i Slidebuilder_x64.msi /qn GRAPHCLIENTID="[client-id]" GRAPHTENANTID="[tenant-id]" CUSTOMUPDATEURL="[SharePoint-link]" AUTOUPDATECONTENT=1
Replace [path to the content] with the correct path.
Installation via Microsoft Endpoint Manager (Microsoft Intune)
Click here to download a user-friendly PDF that outlines the steps for installing via Intune.
UPDATE SLIDEBUILDER CONTENT
Is Slidebuilder already installed and do you want to refresh content hosted on a SharePoint-location as an administrator? Follow the guide with a step-by-step explanation on how to update content
