



Installation: SharePoint
(Granular permissions)
Recommended method. Slidebuilder is granted access only to the required SharePoint location.
App-registration
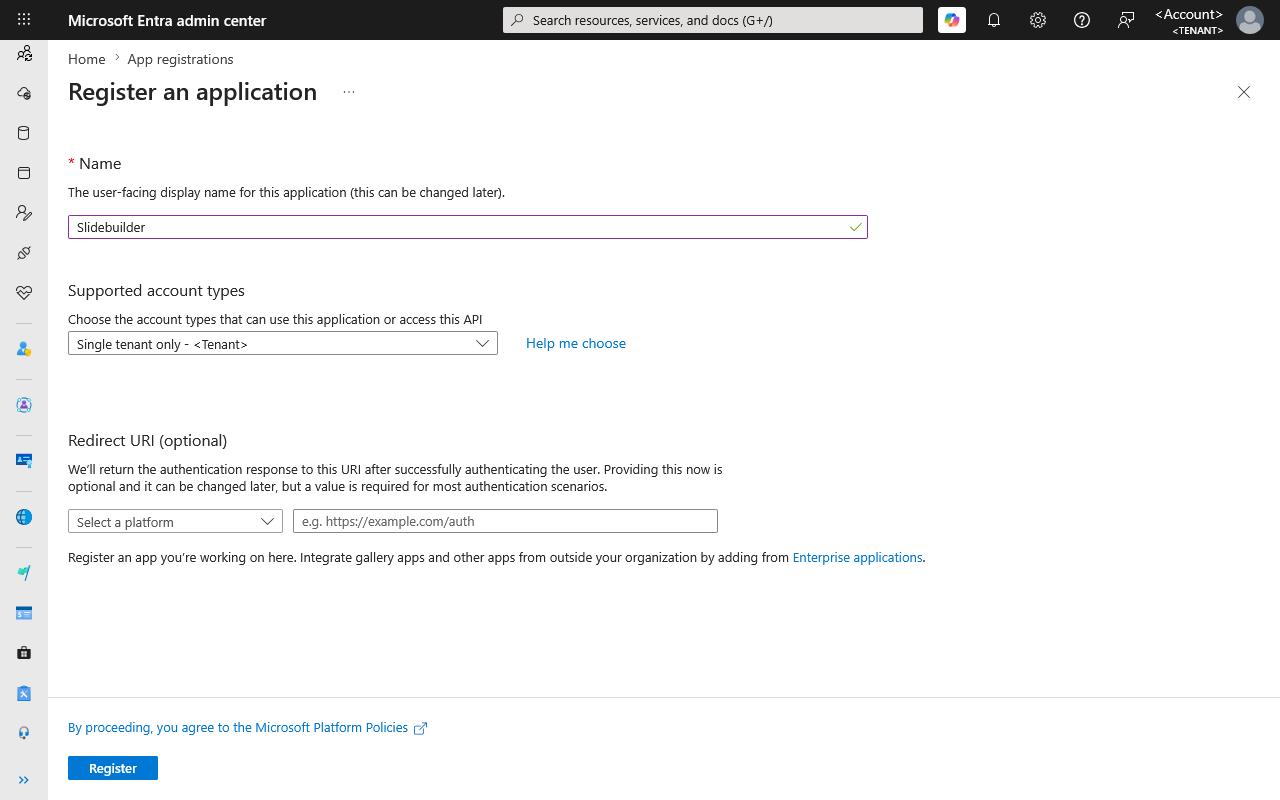
Open the Microsoft Entra portal and navigate to App registrations. Click on New registration.
Give the app a name, such as Slidebuilder, and click Register.
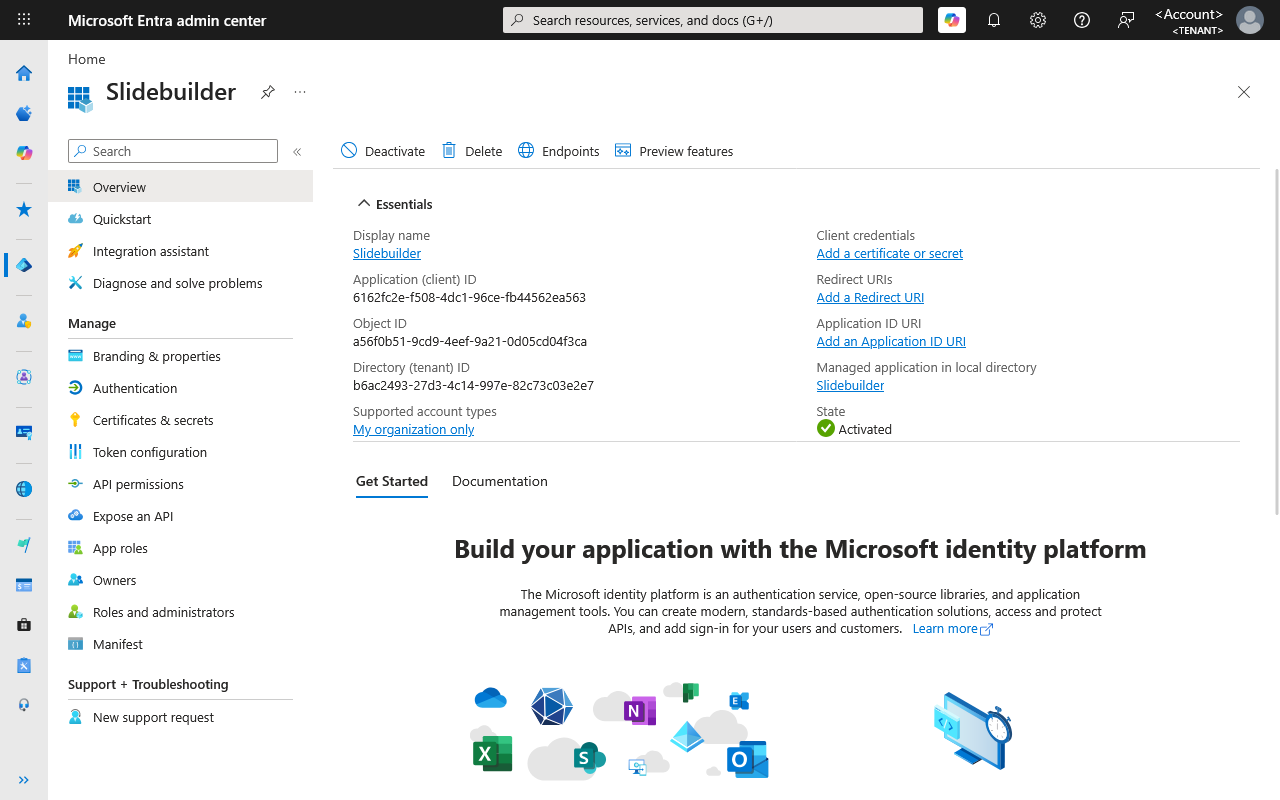
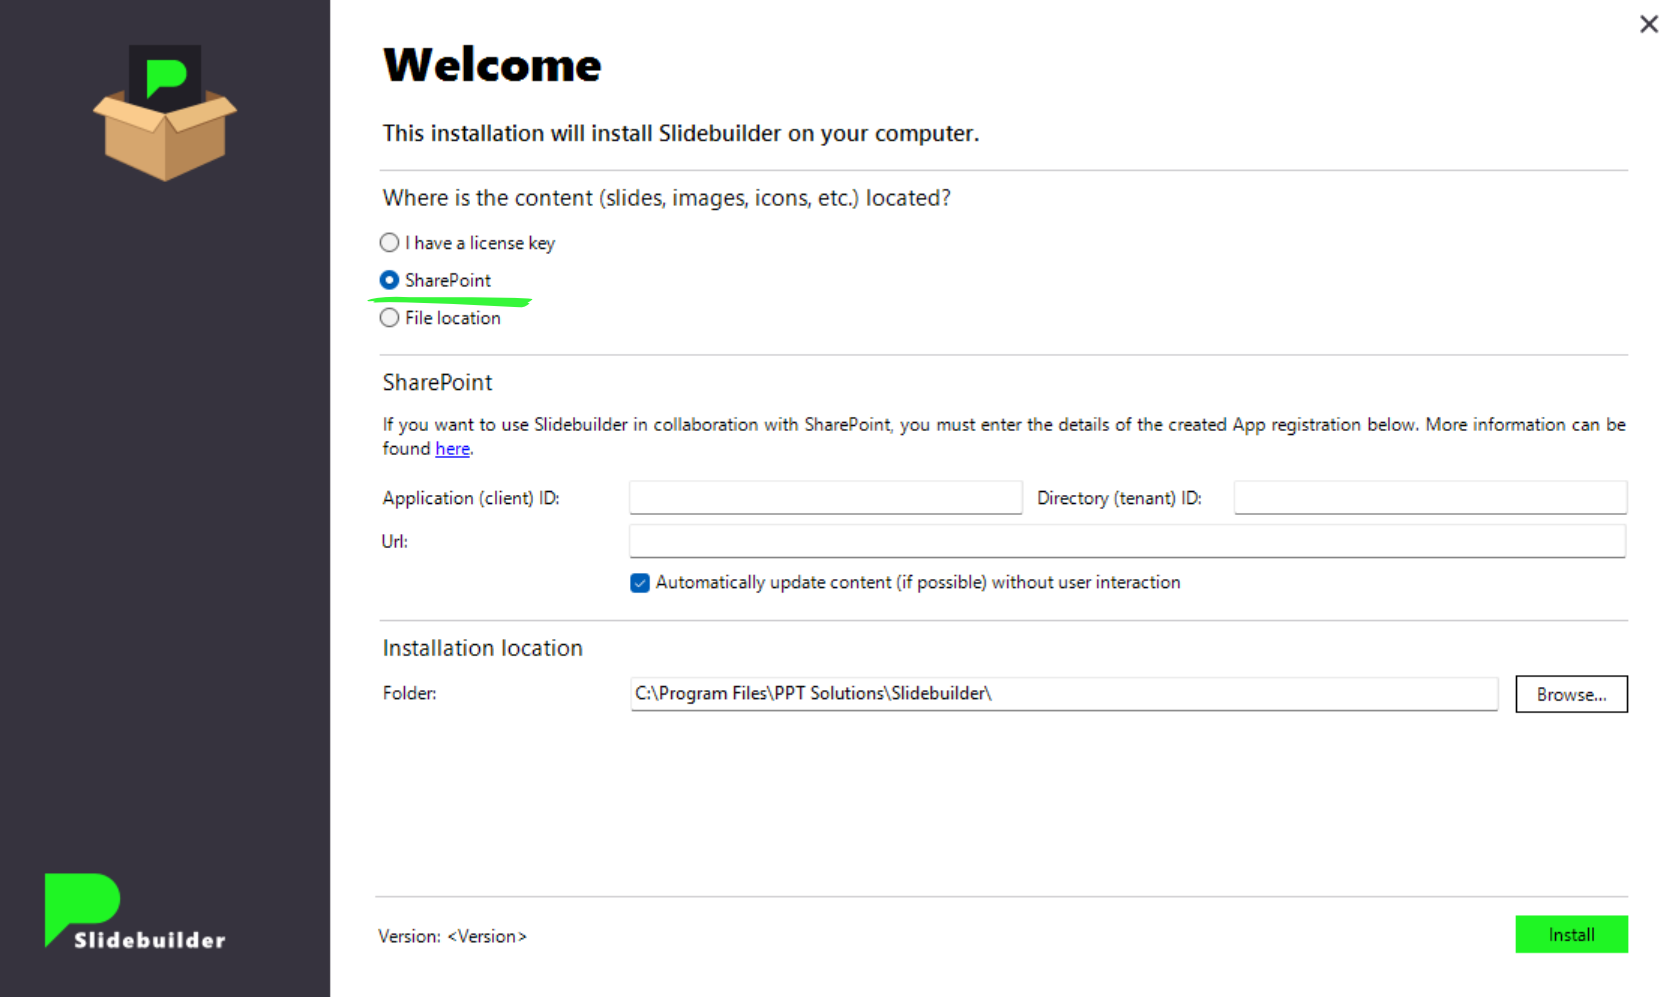
Next, go to Overview and note down the Application (client) ID and Directory (tenant) ID, as you will need both in later steps.
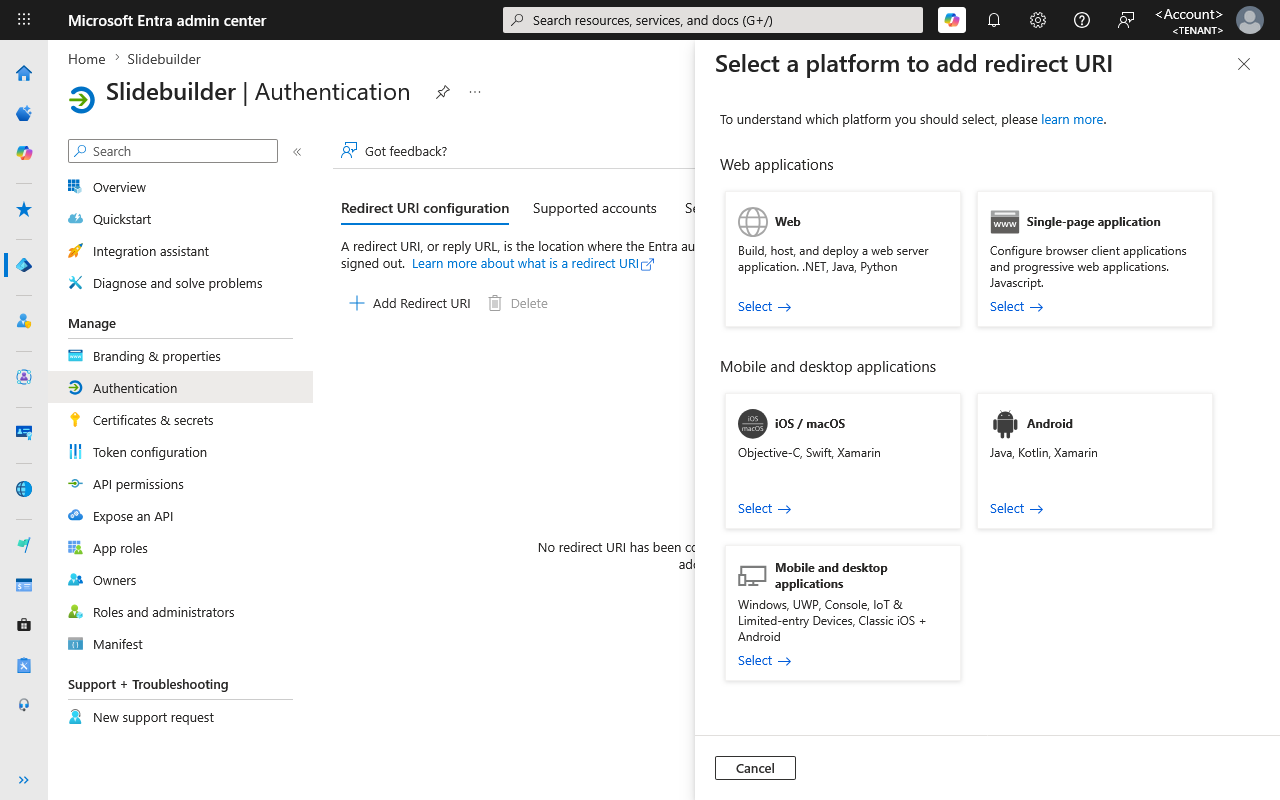
Navigate to Authentication and click Add Redirect URI.
Select Mobile and desktop applications and add the following two URIs:
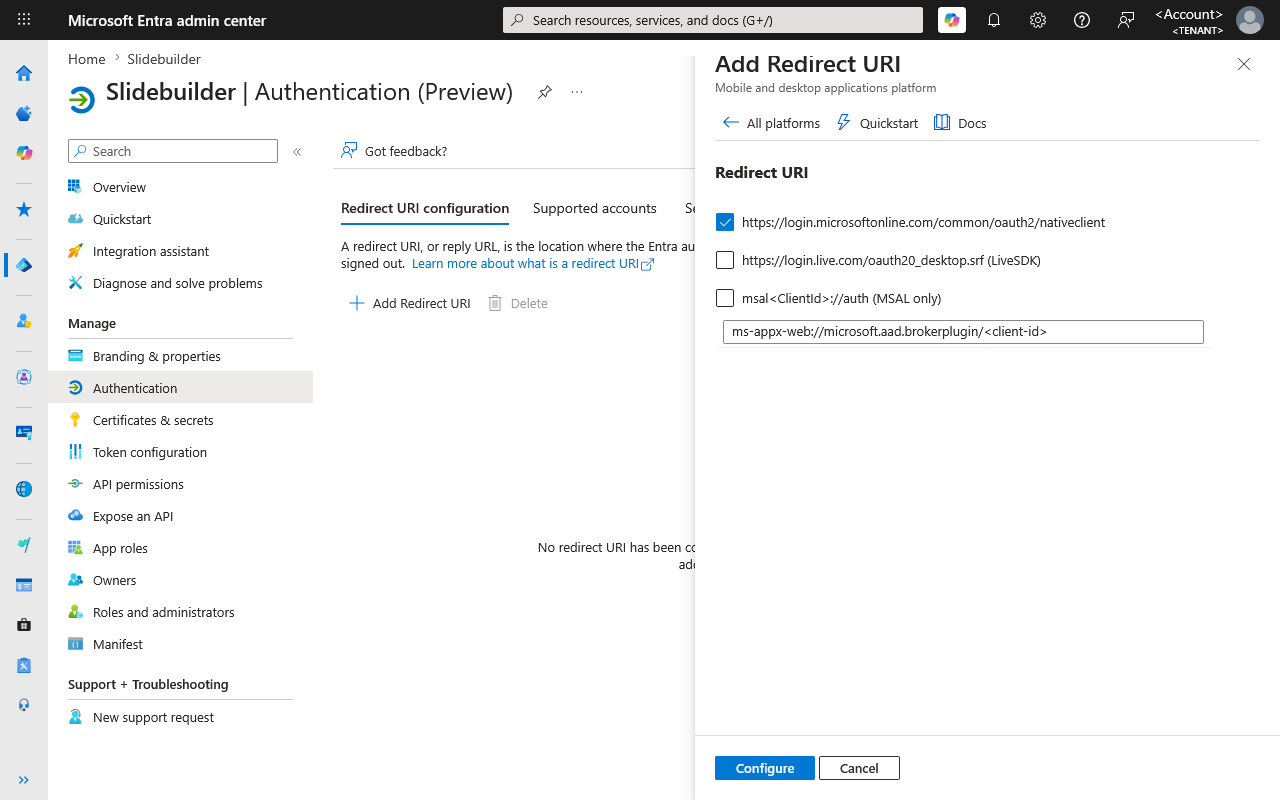
For the second URI, you will need the client ID that you noted down earlier:
ms-appx-web://microsoft.aad.brokerplugin/<client-id>
Click Configure and close the menu.
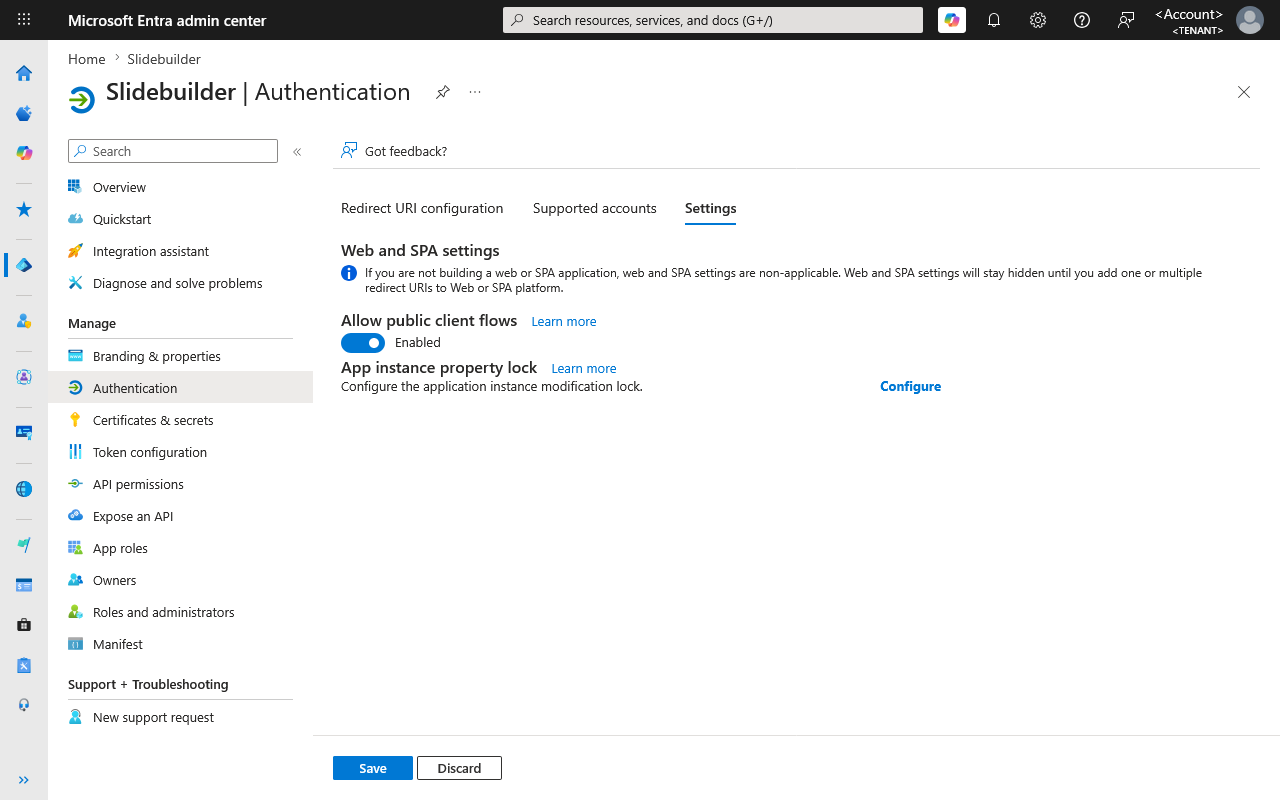
Now go to the Settings tab, enable Allow public client flows, and click Save.
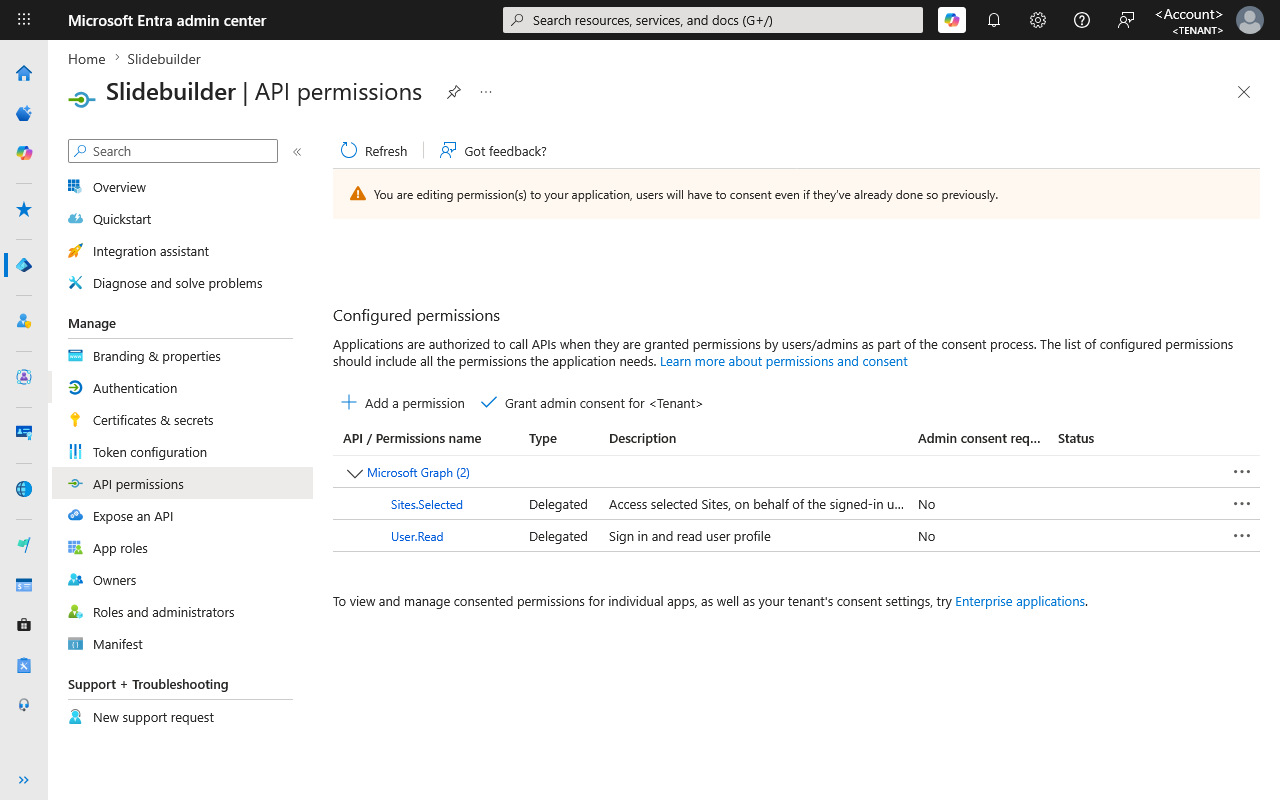
Navigate to API permissions and click Add a permission.
Select:
Microsoft Graph > Delegated permissions > Sites > Sites.Selected
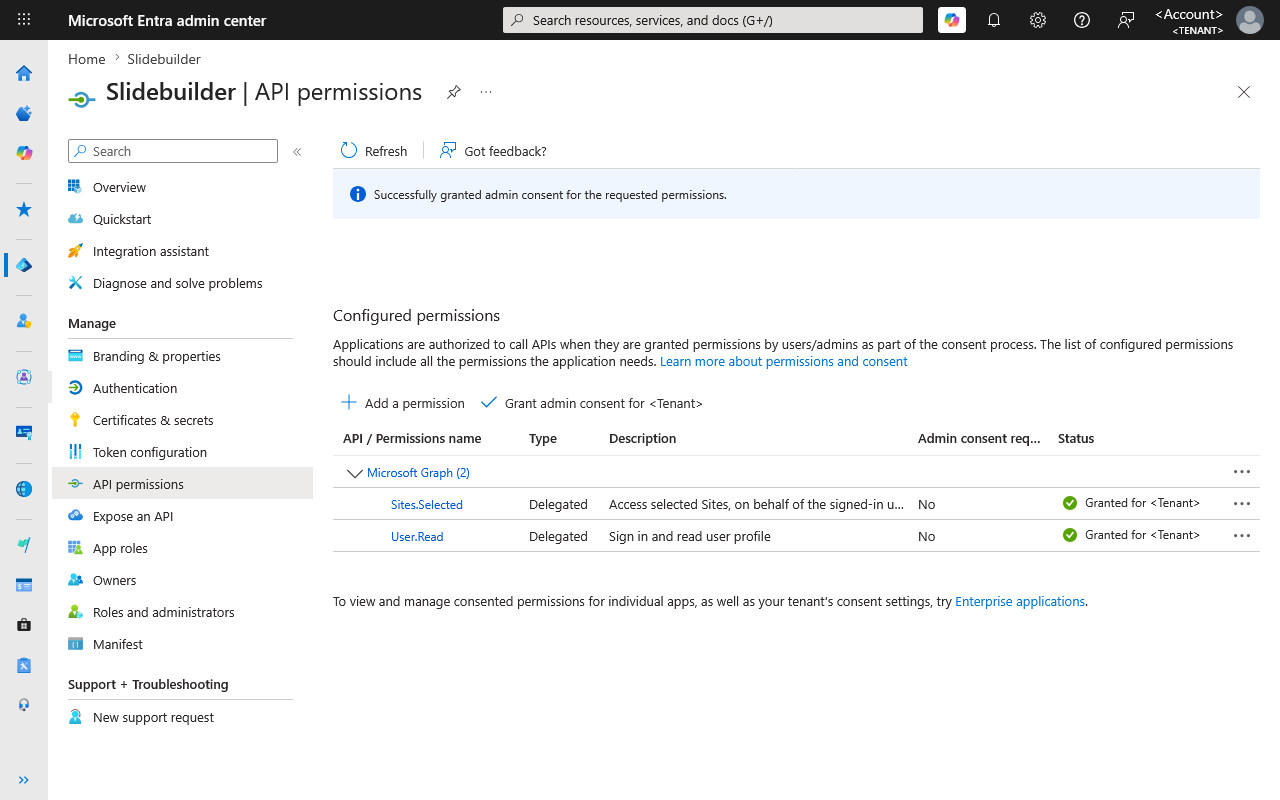
Click Grant admin consent for. This grants consent for all users at once, so you do not need to do this for each user individually. After consent has been granted, green check marks will appear next to the permission.
SharePoint
Introduction
We recommend creating a separate SharePoint site for Slidebuilder. This ensures that the app registration only has access to that site and not to the rest of your environment.
Content
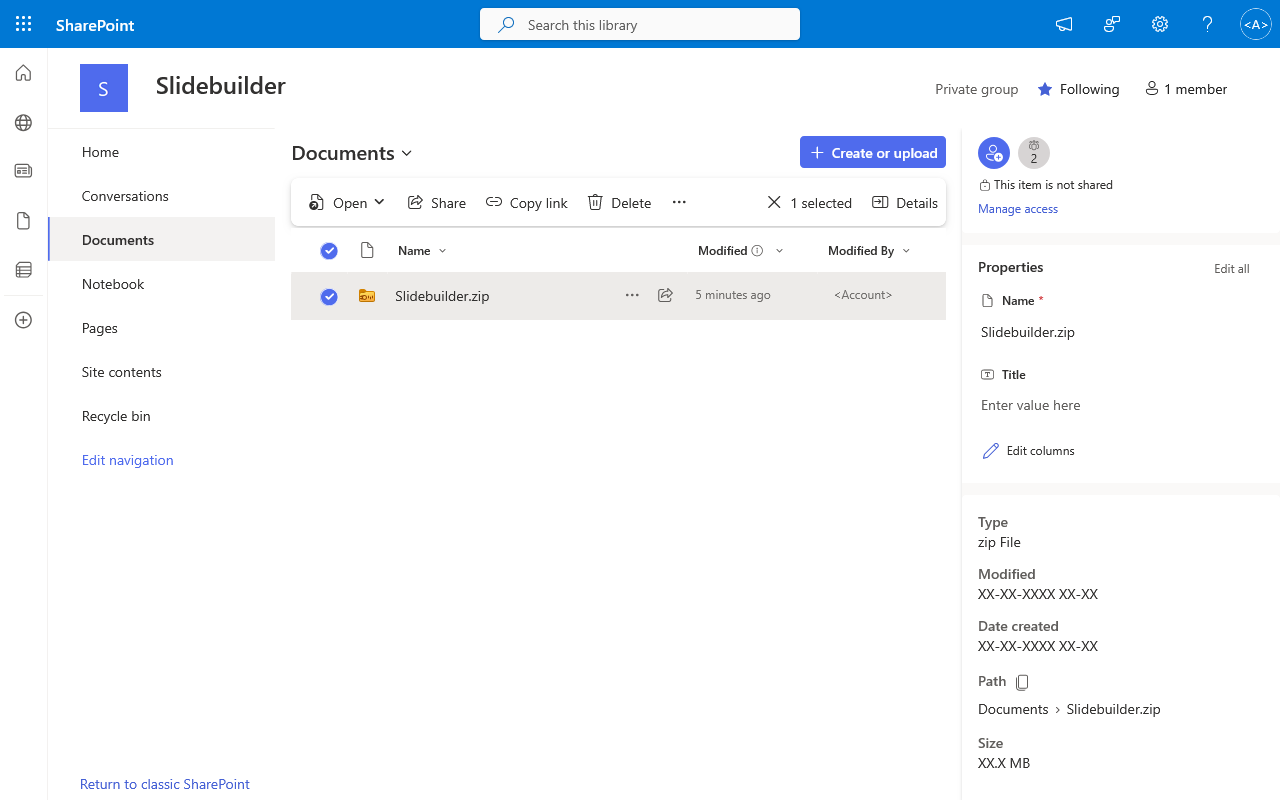
Open the SharePoint site in your browser and upload the Slidebuilder.zip file to it.
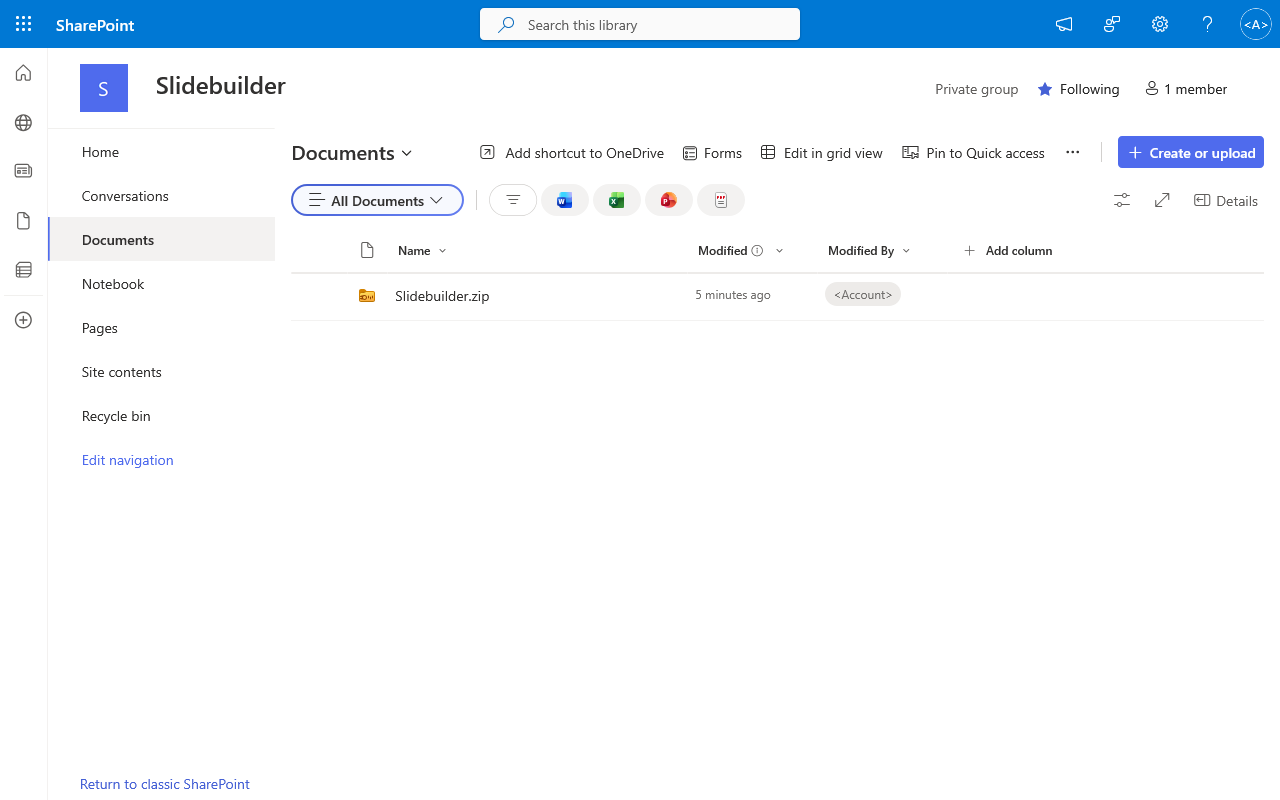
Select the file and click Details in the toolbar. Scroll down on the right-hand side and click the icon next to Path to copy the full path. Note down this value, as you will need it later.
Permissions
The app registration requires read permissions for the SharePoint site. The easiest way to configure this is via the Graph Explorer.
Open the Graph Explorer and sign in using an account with administrator privileges. If you are prompted to grant permissions during sign-in, accept the request..
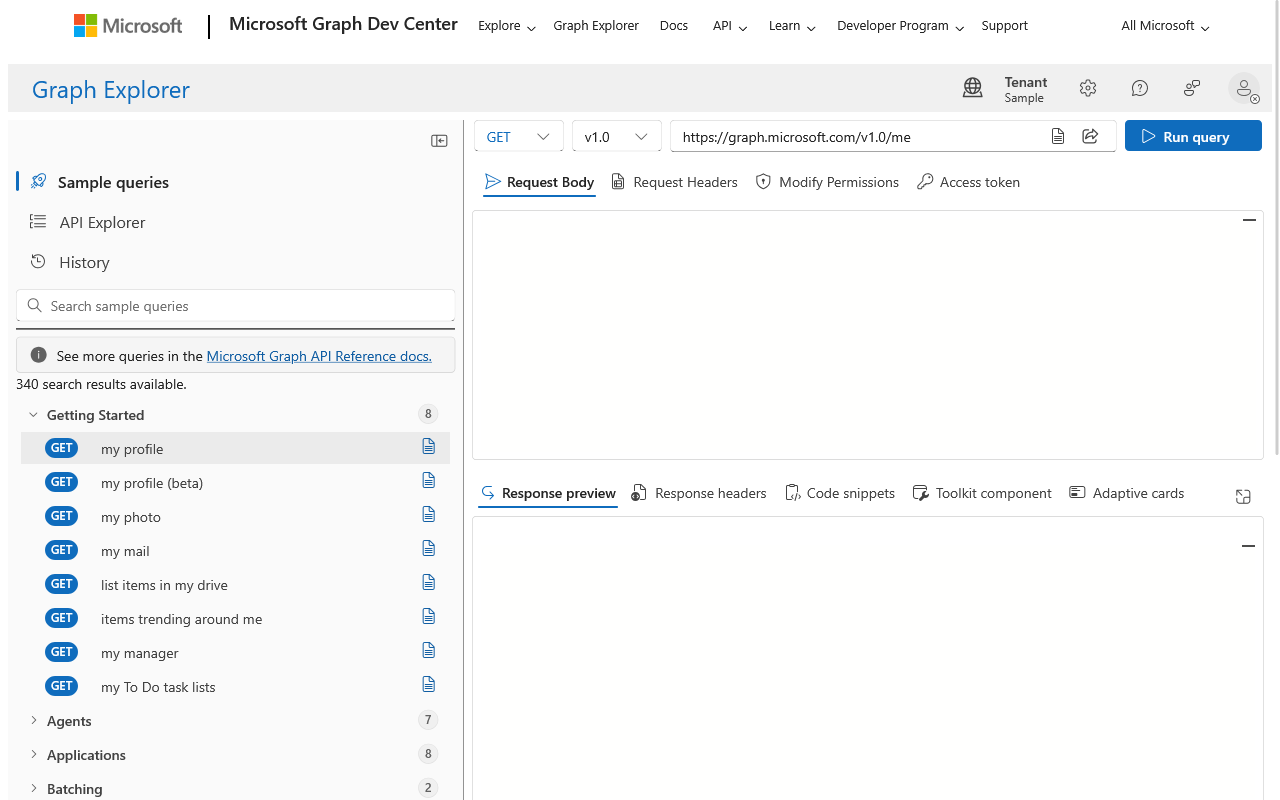
To assign permissions, you need the internal ID of the SharePoint site. Send a GET request ❶ to the following URL ❷, replacing <tenant> and <site> with your own values:
https://graph.microsoft.com/v1.0/sites/<tenant>.sharepoint.com:/sites/<site>
Note!
There is a colon (:) betweensharepoint.comand/sites.
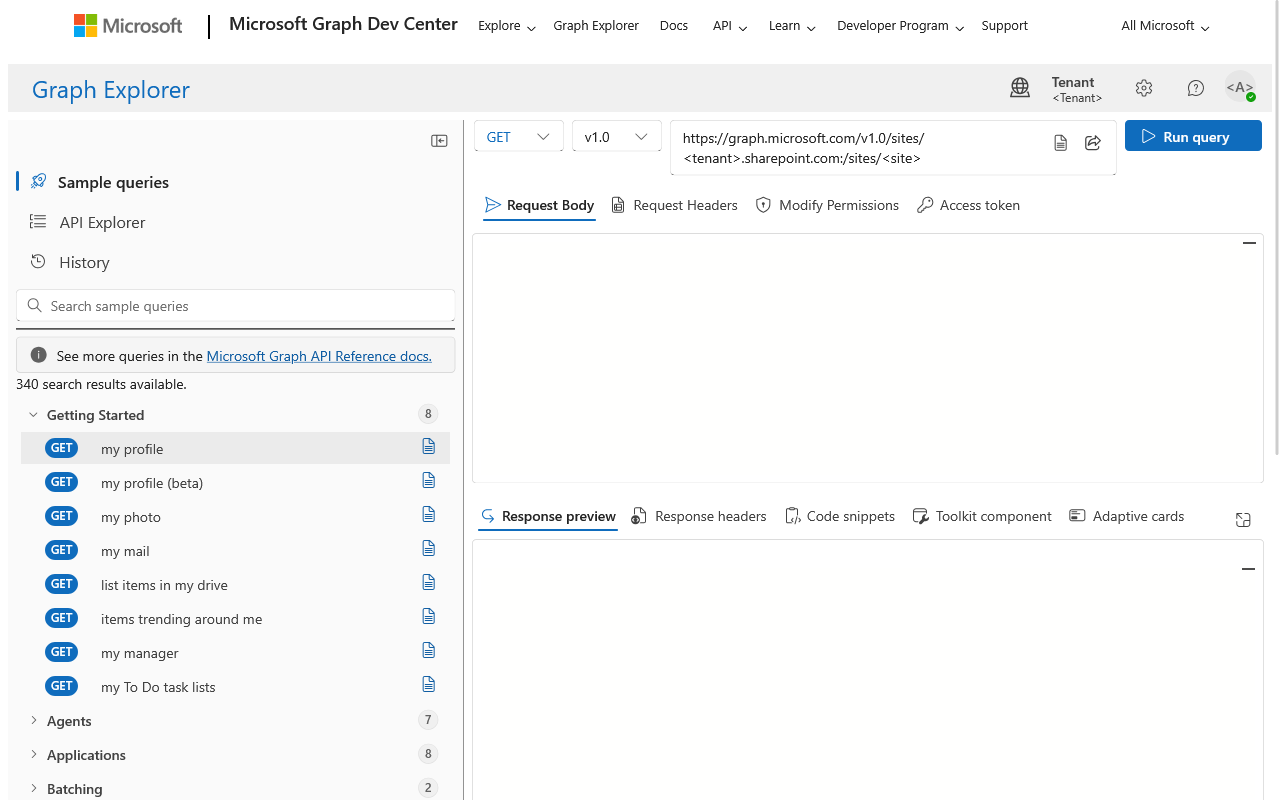
In the response ❹, locate the id field and note down the full value. It will look something like this:
{
"id": "<tenant>.sharepoint.com,<guid>,<guid>",
...
}
Now send a POST request ❶ to the following URL ❷, replacing <id> with the ID you just noted down:
https://graph.microsoft.com/v1.0/sites/<id>/permissions
Use the following request body ❸, replacing <client-id> with the full client ID you noted down earlier:
{
"roles": ["read"],
"grantedToIdentities": [
{
"application": {
"id": "<client-id>",
"displayName": "Slidebuilder"
}
}
]
}
Click Run query. A successful request returns a 201 Created response. If you receive an error indicating insufficient permissions, click Modify Permissions. Sometimes a button appears immediately that allows you to grant the required permissions. If not, click Open the permissions panel, add Sites.FullControl.All, and try again.
This permission is granted only to the Graph Explorer, not to the Slidebuilder app registration.
After completing these steps, the elevated permissions for Graph Explorer are no longer required. You can revoke the Sites.FullControl.All permission via Modify Permissions, or remove the Graph Explorer app registration entirely.
Installation
Manual
Want to test how it works yourself first? If you have completed the steps above, you now have all the information required to perform the installation. Open the MSI file you downloaded at the top of this page, follow the steps below, and click Install.
Unattended install
The installation can also be performed without user interaction, for example via Command Prompt (1 line):
msiexec /i slidebuilder-<version>-<install-type>.msi /qn GRAPHCLIENTID="<client-id>" GRAPHTENANTID="<tenant-id>" CUSTOMUPDATEURL="<sharepoint url>"
Note!
Run this command with sufficient privileges.
Microsoft Intune
Slidebuilder can also be easily deployed via Microsoft Intune. To do so, go to the Microsoft Intune portal and navigate to Apps. Then click Platforms > Windows.
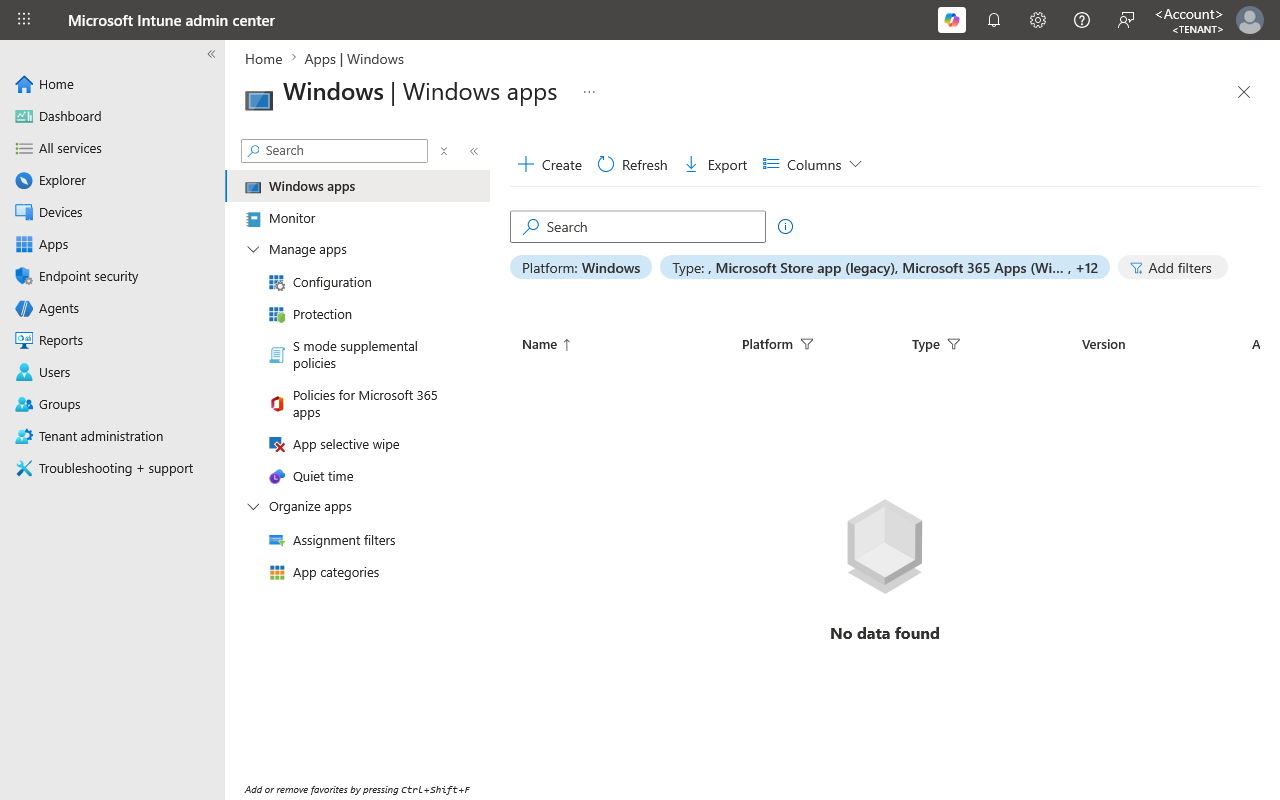
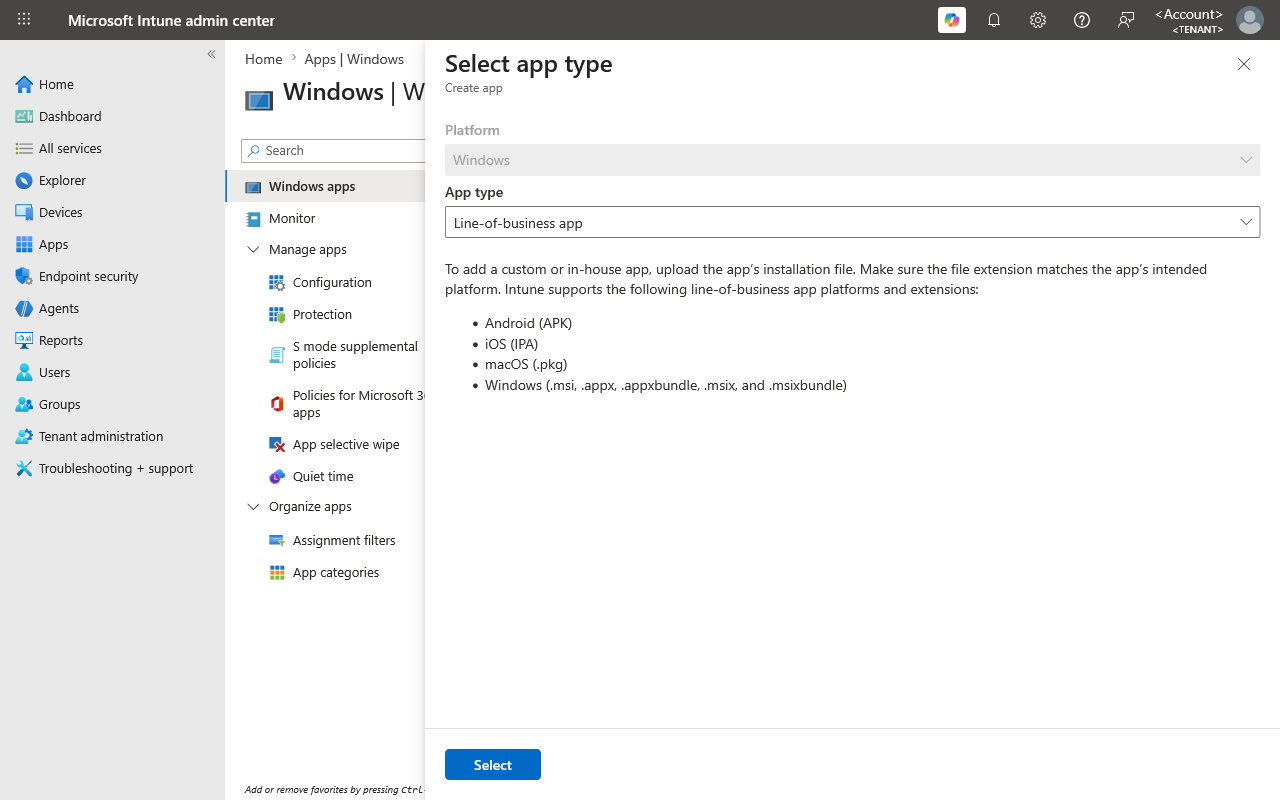
Click Create and select Line-of-business app as the app type. Click Select.
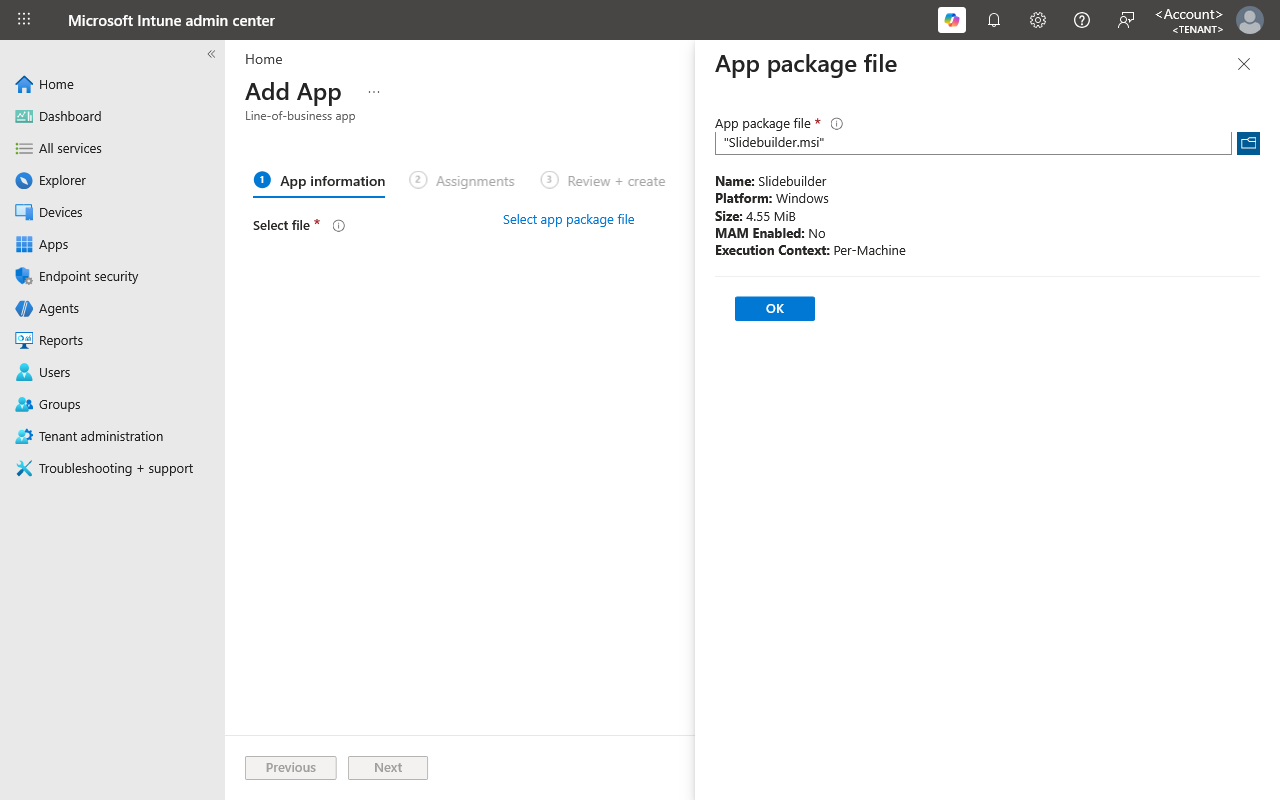
Click Select app package file, choose the MSI file you saved earlier, and then click OK.
On the next page, you will be asked to enter some information. Fill it in as follows:
Description
With Slidebuilder, employees have direct access within PowerPoint to a library of commonly used slides, enabling them to quickly create presentations that comply with the organization’s brand guidelines.
Publisher
Slidebuilder
Command-line arguments
GRAPHCLIENTID="<client-id>" GRAPHTENANTID="<tenant-id>" CUSTOMUPDATEURL="<sharepoint url>"
Logo
You can download the logo file here.

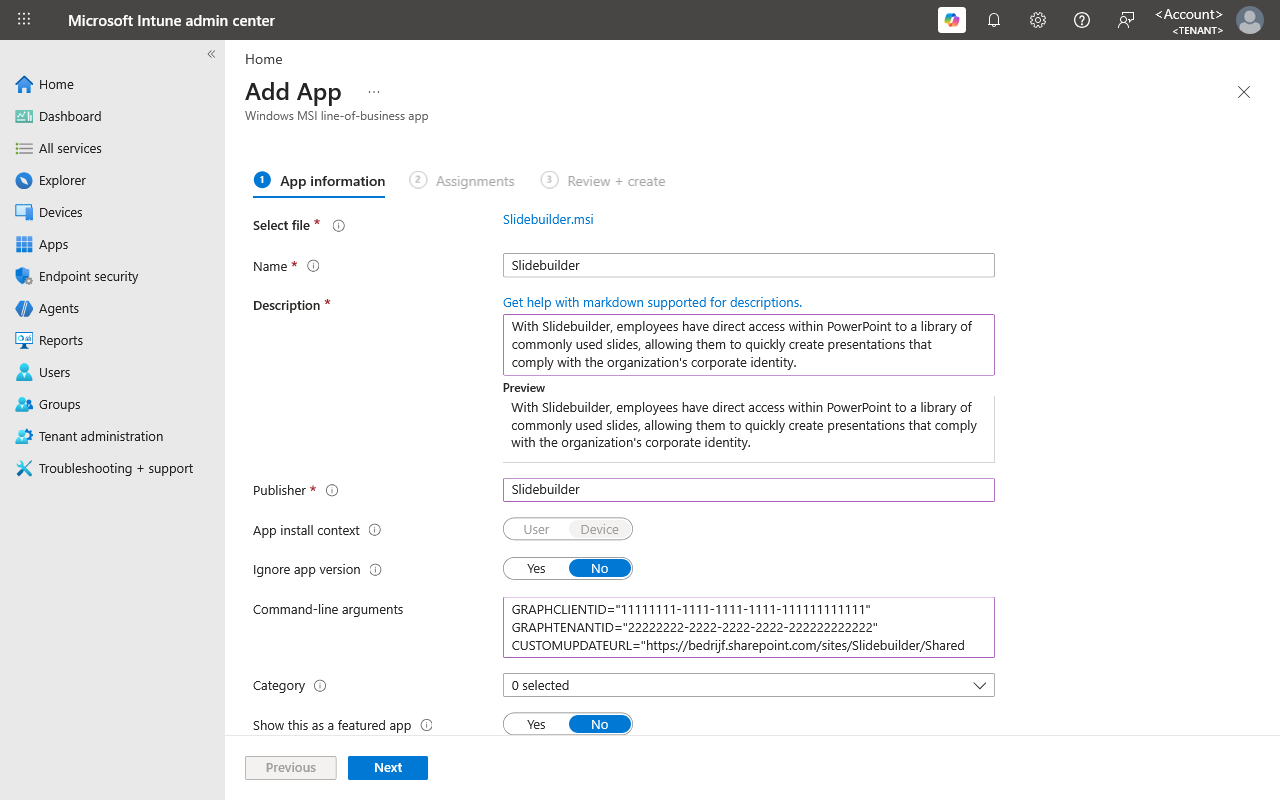
Adjust any other fields as needed and click Next.
Assign the application to the desired group(s).
We recommend starting with a test deployment to a small group of selected users.
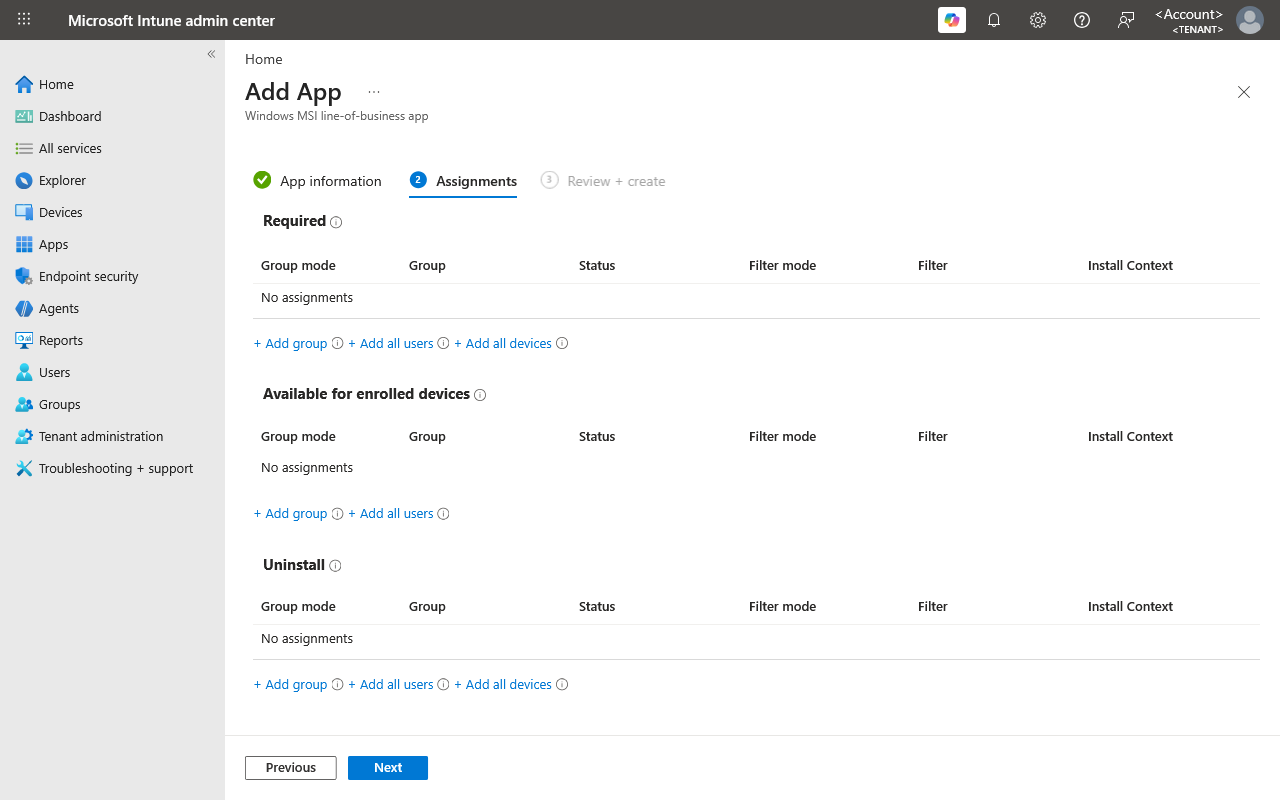
Click Next, review the information, and click Create.
Updating content
Step 1
You have received a new workbook from us via WeTransfer, or generated one yourself if you have access to the Management Tool.
Step 2
Navigate to the SharePoint location where the current Slidebuilder.zip file is stored and replace it with the new file.
Note!
If the current file on SharePoint has a different name than Slidebuilder.zip, first rename the new .zip file to exactly the same name before uploading it.
Success! The new content will automatically become available in PowerPoint for all Slidebuilder users within your organization.
Do you still have questions, or are you having trouble updating the Slidebuilder content? Submit a support ticket below and we’ll get in touch with you as soon as possible to help.